MicroStrategy ONE
Simultaneously creating multiple attributes
During your initial project design effort or later in a project's life cycle, you can create multiple attributes using the Attribute Creation Wizard.
You can also create multiple attributes using Architect, which is described in Adding and modifying attributes.
To create attributes using the Attribute Creation Wizard
This procedure is part of an initial project creation effort using the Project Creation Assistant, which launches the Attribute Creation Wizard to complete the attribute creation tasks. For steps to access the Project Creation Wizard, see Creating a new project using the Project Creation Assistant. You can also access the Attribute Creation Wizard at any time in the development of a project from the Schema menu in MicroStrategy Developer.
-
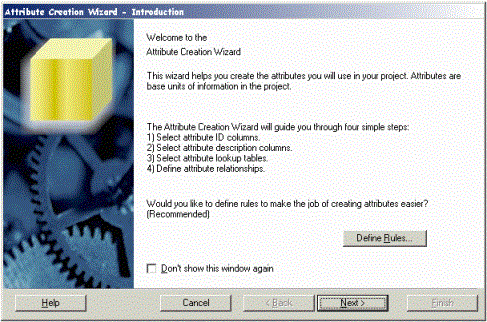
In the Project Creation Assistant, click Create attributes. The Attribute Creation Wizard opens, as shown below.
-
Review the introduction page that is displayed.
Define attribute creation rules
These rules can make the process of choosing attribute columns and naming your attributes considerably easier, especially if you use consistent naming conventions and data types in your data warehouse. The Attribute Creation Wizard uses these rules below to help automate the attribute creation process. Change these rules if the naming or data type conventions in your warehouse do not conform to these defaults.
-
Click Define Rules to set some basic attribute creation rules. The Attribute Creation Rules page opens.
-
The Column data type area allows you to select the column data types to be available as possible attribute ID columns. Select the check boxes for the data types that should be included when the wizard searches the data warehouse for available attribute ID columns.
-
The Attribute name area allows you to determine how to create default attribute names. You can select the appropriate check boxes to set the following default behaviors for creating attribute names:
-
Replace underscores in the attribute name with spaces.
-
Remove the word "ID" from the name.
-
Capitalize the first letter.
-
-
The Warehouse search area determines naming conventions to help locate your warehouse objects. The defaults are ID for identifier columns, DESC for description columns, and LOOKUP for lookup tables.
-
Click OK to accept your rule changes and return to the Attribute Creation Wizard.
Select the ID column
An ID column is a column or group of columns that uniquely identifies each element of an attribute.
-
Click Next. The ID Column Selection page opens.
When choosing the ID column for an attribute, make sure that all values in the column are unique and that it does not contain NULL values. You should never use a column that has NULL or repeated values as the ID column for an attribute. Doing so results in unexpected behavior and errors.
Only those columns with data types that match those chosen in the rules you defined above appear on the ID Selection page. The columns that match the identifier naming convention that you set in the warehouse search rule above are automatically highlighted.
-
From the Available columns pane, select the columns to use for your attribute IDs and click > to add them to your project. Click >> to add all the listed columns.
-
You can rename any attribute name to make it more user-friendly by right-clicking the attribute and selecting Rename.
-
To remove attribute ID columns from your project, select the attribute IDs in the Attributes pane and click < to move them to the Available columns pane.
-
The Attribute Creation Wizard cannot handle columns that hold the same information but have different column names (that is, heterogeneous columns). For more information about mapping attributes to heterogeneous columns, see Attribute form expressions.
-
Create compound attributes
A compound attribute is defined as an attribute with more than one column specified as the ID column. This implies that more than one ID column is needed to uniquely identify the elements of that attribute (see Attributes with multiple ID columns: Compound attributes).
-
To create a compound attribute, complete the following steps:
-
Click Compound Attributes and then click Add. The New Compound Attribute dialog box opens.
-
Type a name for the attribute.
-
Select the columns that are required to uniquely identify the compound attribute and click OK. You are returned to the Attribute Creation Wizard.
-
Select the description column
Description columns provide the data which gives context and meaning to your attributes.
-
After adding all your attribute ID columns, click Next. The Description Column Selection page opens.
-
Select whether to use the ID or a different column for the description of the attribute. The column that meets the description naming convention that you set in the warehouse search rule is automatically selected.
In general, you should use the default description column for each attribute. In some cases, however, it may make sense to use the ID column as the description column, such as Year.
Other attribute forms need to be created through the Attribute Editor after you complete steps in the Project Creation Assistant. Refer to Adding and modifying attributes, for more information about attribute forms.
Select the lookup table
Lookup tables are the physical representation of attributes; they provide the information for an attribute through data stored in their ID and description columns.
-
Click Next when you are finished selecting description columns for attributes. The Lookup Table Selection page opens.
-
Select the lookup table for each attribute.
The table that follows the lookup naming convention that you set in the warehouse search rule is automatically selected. In general, you should choose the default lookup table for each attribute.
-
Click Next:
-
If you have created compound attributes, the Compound Attribute Definition page opens. Specify the lookup table and description column for the compound attributes and click Next. The Relationship Definition page opens.
-
If you have not created a compound attribute, the Relationship Definition page opens.
-
Define the relationship
For each attribute, you specify the children and the type of relationship: one-to-one, one-to-many, or many-to-many. When you design a logical data model for your project (see The Logical Data Model), the relationships between attributes should become apparent. Related attributes such as City, State, or Region are often grouped in a common hierarchy, like Location. In a logical data model, when attributes are in the same hierarchy they must be related to each other, whereas attributes in different hierarchies cannot be related.
-
For each attribute, define child attributes:
-
In the Attributes pane, select an attribute and click Add. The Select Children Attributes dialog box opens.
-
Select the child attributes from the list of available child attributes and click OK. You are returned to the Attribute Creation Wizard.
-
In the Children of: attribute name pane, select the relationship type for the attribute to its child attribute. For more information on the different attribute relationship types, see Attribute relationships.
-
-
When you have defined children for all the attributes that need them, click Next. The Finish page opens.
-
Review the summary information in the Finish page and click Finish to create the attributes.
After you have completed the steps of the Attribute Creation Wizard, the attributes are created. This completes the initial creation of a project with the Project Creation Assistant.