MicroStrategy ONE
Adding and removing shortcuts from the Shortcut Bar
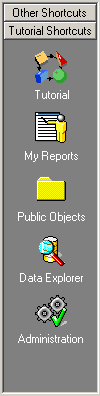
Shortcuts are icons on the left side of Developer that provide instant access to commonly used folders. Shortcut icons are displayed within groups, called shortcut groups. The image below shows the two default shortcut groups, Tutorial Shortcuts and Other Shortcuts. The shortcut icons within the Tutorial Shortcuts group are displayed:
Use the following procedures to create new shortcut groups, add shortcut icons to groups, and rename or remove icons and groups.
Creating a shortcut group
Shortcut icons are displayed within groups, called shortcut groups. By default, the Shortcut Bar contains two shortcut groups, namely Tutorial Shortcuts and Other Shortcuts. You can create additional groups of shortcut icons, which can be useful for large MicroStrategy implementations.
You can view the shortcuts within each group by clicking the group name in the Shortcut Bar. For example, when you click Tutorial Shortcuts in the Shortcut Bar, the Tutorial Shortcuts group expands to display the shortcuts to the Tutorial project login, the Tutorial project's My Reports folder, the Tutorial project's Public Objects folder, and so on. The image above displays the Tutorial Shortcuts group and its default shortcut icons.
To create a shortcut group
- Right-click an empty area of the Shortcut Bar and select Add Group.
- In the Create a new shortcut group dialog box, type a name for the new group and click OK.
Adding a shortcut icon to a group
When you want to create a new shortcut to a commonly used folder or project, you must create the shortcut icon within an existing shortcut group.
To add a shortcut icon to a group in the Shortcut Bar
- On the Shortcut Bar, click the shortcut group to which you want to add your new shortcut. Any shortcuts which are currently in the group appear in the Shortcut Bar.
- In the Folder List, right-click the project or folder for which you want to create a shortcut, and select Add to Shortcut Bar.
By default, the name of the shortcut icon is the same as the name of the folder or project for which you created the shortcut. You can rename any shortcut icon by right-clicking it and selecting Rename Shortcut.
Removing a shortcut icon from the Shortcut Bar
To remove a shortcut icon from the Shortcut Bar
- Right-click the shortcut and select Remove from Shortcut Bar.
- In the confirmation dialog box, click Yes.
Removing a shortcut group from the Shortcut Bar
If you remove a group that has existing shortcut icons within it, the shortcut icons are deleted also.
To remove a shortcut group
- Click the shortcut group you want to remove. The shortcut icons which are currently in the group appear in the Shortcut Bar.
- Right-click an empty area of the Shortcut Bar and select Remove Group.
- In the confirmation dialog box, click Yes to remove the shortcut group.
Renaming a shortcut icon or shortcut group
By default, the name of a shortcut icon is the same as the name of the folder or project for which you created the shortcut. You can rename any shortcut icon by right-clicking it and selecting Rename Shortcut.
To rename a shortcut group
- Click the shortcut group you want to rename.
- Right-click an empty area of the Shortcut Bar and select Rename Group.
- In the Rename a shortcut group dialog box, type a name for the shortcut group and click OK.