Strategy ONE
Adding data into a project
Once data sources are connected to a project, you can add data from these data sources into the project. This can be done by importing tables from your data sources into the project.
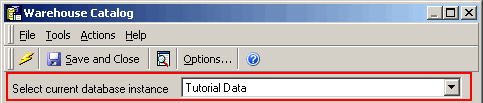
Tables can be imported into a project using the Warehouse Catalog or Architect. In the Warehouse Catalog, you can use the Select current database instance drop-down list shown below to switch between the data sources you are importing tables for.
In Architect, you can use the Warehouse Tables pane shown below to switch between the data sources you are importing tables for.
If the tables that you import from various sources all use different table names, the tables are imported exactly as they are when only a single data source is used. You can also import tables with the same name from different data sources, and is described in Supporting duplicate tables in multiple data sources below.
Supporting duplicate tables in multiple data sources
You can support the integration of duplicate tables in multiple data sources through the use of MultiSource Option. The MicroStrategy SQL Engine can then obtain any required attribute information from the data source that stores that information. This process can return this information to reports and documents without any extra considerations or tasks for a report or document designer.
Including duplicate copies of tables from different data sources allows MicroStrategy to execute within a single data source for certain types of queries.
For example, you have two data sources. One data source stores historical data for your company. The other data source stores forecast data for the same business sectors. Each data source includes duplicate copies of tables that store attribute information, which describe the context of data. The data sources differ in the availability of historical data versus forecast data, which is integrated into your MicroStrategy project through the use of facts and metrics.
In this scenario, including each copy of the tables that include attribute information from both data sources allows some queries to be processed within a single data source. By including these duplicate copies, users that only need to view historical data can have their query resolved within a single data source. Similarly, users that only need to view forecast data can have their query resolved completely within the other data source. This reduces the time and system resources required for these types of queries since working within a single data source is more efficient than querying across multiple data sources.
Including both historical and forecast data on the same report from these different data sources is also possible in this scenario through the use of MultiSource Option. However, since the historical and forecast data are only available in separate data sources, this query must include both data sources.
To import multiple copies of the same table from different data sources into a project, the requirements listed below must be met:
-
The table name and column names must be exactly the same.
-
One of the copies of the table must act as the primary table used in the project. All of the columns in this table must also be present in the other copies of the table from other data sources. The other copies of the table that are used as secondary tables can include additional columns of information. However, these additional columns are not included in the project when the table is added.
-
When you import multiple copies of a table from multiple data sources, import the table that is to act as the primary table first. Once you import the primary table, you can begin importing secondary tables from the other data sources.
If you do not import the primary table first, you may have to remove some tables and then add them back into the project after the primary table is imported. This workflow may be required to update existing projects that did not previously use MultiSource Option.
-
The data types of matching columns must be compatible. Compatibility of column data types is described below:
-
A Decimal data type with a scale of zero is compatible with the Integer data type.
-
A Numeric data type with a scale of zero is compatible with the Integer data type.
-
A Decimal data type is compatible with a Numeric data type.
-
Double, Float, and Real data types are all compatible with each other.
-
A Date data type is compatible with a Timestamp data type.
-
A Time data type is compatible with a Timestamp data type.
-
A Char data type is compatible with a VarChar data type.
-
Any other data types are only compatible with an identical data type.
Be aware that a Date data type is not compatible with a Time data type, and NVarChar and NChar data types are not compatible with VarChar and Char data types.
-
The procedures below describe how to import multiple copies of the same table into MicroStrategy using the Warehouse Catalog or Architect:
-
Importing tables from multiple data sources in a project using the Warehouse Catalog
-
Importing tables from multiple data sources in a project using Architect
Importing tables from multiple data sources in a project using the Warehouse Catalog
Prerequisite
You must have MultiSource Option to connect multiple data sources to a project.
To import tables from multiple data sources in a project using the Warehouse Catalog
-
In Developer, log in to a project.
-
From the Schema menu, select Warehouse Catalog. The Warehouse Catalog opens.
-
From the Select current database instance drop-down list, select the database instance for one of the data sources the table resides in. The first data source you use to import a table should be the one you plan to use as the primary data source for the table.
Importing a table from the primary database instance for a project or a non-primary database instance has an effect on how the table is updated when the primary database instance for a project is changed, as described in Importing tables as part of the project's primary database instance.
-
In the Tables available in the database instance pane, select the table to add to the project and click the > button. The first copy of the table is added to the project and is displayed in the Tables being Used in the Project pane.
To add copies of a table from other database instances
-
From the Select current database instance drop-down list, select the database instance for a different data source that also includes the table.
-
In the Tables available in the database instance pane, select the table to add to the project and click the > button.
If all of the required conditions to import multiple copies of the table (listed in Supporting duplicate tables in multiple data sources ) are met, a Warehouse Catalog Browser dialog box opens. To include a copy of the table in the project, select Indicate that TABLE_NAME is also available from the current DB instance, and click OK. The copy of the table is added to the project and is displayed in the Tables being Used in the Project pane.
Review any messages displayed when attempting to import a copy of a table from a different data source.
To add additional tables and configure the tables included in the project
-
To add tables from additional data sources, repeat the steps in To add copies of a table from other database instances above.
-
In the Tables being used in the project pane, right-click the table and select Table Database Instances. The Available Database Instances dialog box opens.
-
From the Primary Database Instance drop-down list, select a database instance for the data source that stores the primary table for the project. All of the columns in this primary table must also be present in the other copies of the table from other data sources. Any additional columns available in other copies of the table that are used as secondary tables are not included in the MicroStrategy project.
-
The Secondary Database Instances pane lists the other data sources that the table is available from for the project. You can clear the check box next to a data source to remove that copy of the table from the project.
-
Click OK. You are returned to the Warehouse Catalog.
-
Click Save and Close to save your changes and close the Warehouse Catalog.
Importing tables from multiple data sources in a project using Architect
Prerequisites
You must have the MultiSource Option to connect multiple data sources to a project.
To import tables from multiple data sources in a project using Architect
-
In Developer, log in to a project.
-
From the Schema menu, select Architect. MicroStrategy Architect opens.
-
From the Project Tables View, in the Warehouse Tables pane, expand the database instance for one of the data sources the table resides in. The first data source you use to import a table should be the one you plan to use as the primary data source for the table.
Importing a table from the primary database instance for a project or a non-primary database instance has an effect on how the table is updated when the primary database instance for a project is changed, as described in Importing tables as part of the project's primary database instance.
-
From the Warehouse Tables pane, right-click the table to add to the project and select Add Table to Project. The first copy of the table is added to the project and is displayed in the Project Tables View of Architect.
To add copies of a table from other database instances
-
From the Warehouse Tables pane, expand the database instance for a different data source that also includes the table.
-
From the Warehouse Tables pane, right-click the table to add to the project and select Add Table to Project.
If all of the required conditions to import multiple copies of the table (listed in Supporting duplicate tables in multiple data sources ) are met, an Options dialog box opens. To include a copy of the table in the project, select Indicate that TABLE_NAME is also available from the current DB instance, and click OK. The copy of the table is added to the project and is displayed in the Project Tables View of Architect.
Review any messages displayed when attempting to import a copy of a table from a different data source.
To add additional tables and configure the tables included in the project
-
To add tables from additional data sources, repeat the steps in To add copies of a table from other database instances above.
-
From the Project Tables View, select the table. Information on the table is displayed in the Properties pane.
-
From the Properties pane, select the Primary DB Instance option, and then click ... (Browse). The Available Database Instances dialog box opens.
-
From the Primary Database Instance drop-down list, select a database instance for the data source that stores the primary table for the project. All of the columns in this primary table must also be present in the other copies of the table from other data sources. Any additional columns available in other copies of the table that are used as secondary tables are not included in the MicroStrategy project.
-
The Secondary Database Instances pane lists the other data sources that the table is available from for the project. You can clear the check box next to a data source to remove that copy of the table from the project.
-
Click OK. You are returned to Architect.
-
Click Save and Close to save your changes and close the Warehouse Catalog.
Importing tables as part of the project's primary database instance
Importing a table from the primary database instance for a project or a non-primary database instance has an effect on how the table is updated when the primary database instance for a project is changed:
-
If you import a table from the primary database instance for a project, the table's primary data source is updated when the primary database instance for the project is changed. This supports scenarios such as moving from a testing environment to a production environment where different database instances are used for each environment.
For example, tables are imported into a project from the primary database instance of a project. The primary database instance is for testing purposes. When the system is switched into production, a new production database instance is defined as the new primary database instance for the project. During the switch of primary database instances, all tables that were imported with the original (testing) primary database instance are modified to use the new (production) primary database instance. This example scenario is shown below, which illustrates that the tables remain connected to the new primary database instance.

-
If you import a table from a non-primary database instance for a project, the database instance used for the initial import remains as the primary data source for the table. This supports scenarios in which a table is only provided in secondary data sources that are not the primary data source for the project.
You can modify a table to always use the primary database instance as its primary data source. Steps on how to switch the database instance for a table are provided below.
To switch primary database instances for a table
-
In MicroStrategy Developer, log in to a project.
-
From the Schema menu, select Warehouse Catalog. The Warehouse Catalog opens.
-
In the Tables being used in the project area, right-click a table and select Table Database Instances. The Available Database Instances dialog box opens.
-
From the Primary Database Instance drop-down list, select the database instance to act as the primary database instance for the table:
-
The database instance that is used as the primary database instance for a project is listed twice in the drop-down list. An example of this is shown below:

-
If you select the database instance that is listed as the project's primary database instance, the table's primary data source is updated when the primary database instance for the project is changed.
-
If you select the database instance that is listed without the project primary database instance distinction, this database instance remains as the primary data source for the table even if a new project primary database instance is selected.
-
-
The other database instances listed that are not the project's primary database instance can also be selected. If selected, the database instance remains as the primary data source for the table.
-
-
Click OK. If any warnings are displayed, read the information and take any required action.
-
In the Warehouse Catalog, click Save and Close to save your changes.