MicroStrategy ONE
Configuring VPNC with MicroStrategy Identity
Perform the following procedure to configure VPNC with MicroStrategy Identity. The procedure assumes that MicroStrategy Identity is used as the primary factor authentication. Thus, users must enter their username and the OTP to authenticate.
SecureAuth RADIUS Service is running on the SecureAuth IdP appliance with Cisco ASA added as a client
Successfully configured a SecureAuth OTP application (SecureAuth Apps & Tools)
Access to Cisco ASA via ASDM
Configuring VPNC with MicroStrategy Identity
- Log in to Cisco ASA via ASDM.
- Select Configuration > Remote Access VPN > Network (Client) Access > IPsec(IKEv1) Connection Profiles.
- Create a new Connection Profile or use an existing Connection Profile and Group Policy.
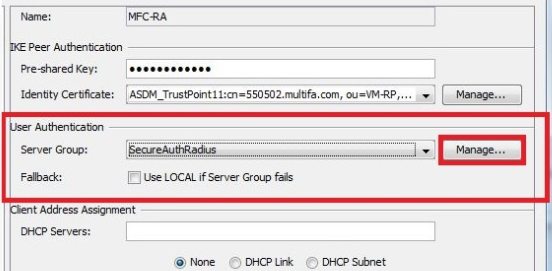
- Enter a Name for the connection profile.
- In IKE Peer Authentication, enter a pre-shared key which is used in the users VPN client.
- Use an Identity Certificate for the profile.
- In the User Authentication area, click Manage to create an AAA authentication for the profile, which is SecureAuthRADIUS.
- Under AAA Server Group, click Add.
- Enter a name for the AAA Server Group and set the Protocol to RADIUS.
- Select the newly created AAA Server Group and click AAA on the bottom section to add the server name.
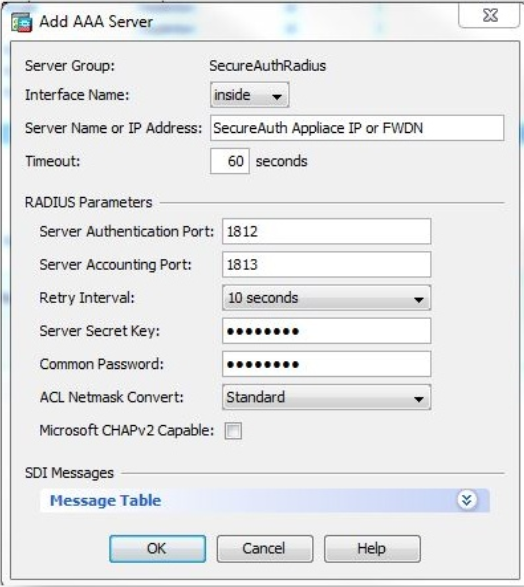
- Enter the following into the Add AAA Server dialog box:
- Interface Name: ASA interface that communicates with SecureAuth IdP
- Server Name or IP Address: SecureAuth Server FQDN or IP address
- Timeout: 60 seconds recommended
- Server Authentication Port: 1812
- Server Accounting Port: 1813
- Retry Interval: 10 Seconds recommended
- Server Secret Key: SecureAuth Radius Shared Secret
- Common Password: NONE
- Microsoft CHAPv2 Capable: Unchecked
- Click OK, then click OK again.
- Create a Group Policy for the VPN Profile or use the existing profile.
- Select the DHCP and Client Address pools for the VPN connection.
- Ensure that Enable IPsec Protocol is checked.
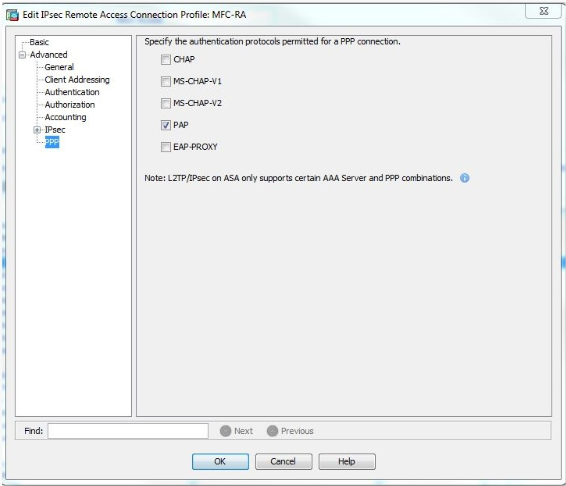
- On the Connection Profile, expand Advanced and select PPP.
- Under the Authentication Protocol Specification, check PAP and click OK.
- Save the configuration.
- Test that the configuration works properly:
Log into the VPN using OTP:
- Connect to the newly created profile.
- When prompted, enter the AD Username and Password.
- Enter the OTP code from the SecureAuth OTP App to connect to the VPN.