Strategy One
Integrate Strategy with Teradata for Single Sign-On Using Azure OIDC
Strategy ONE Update 10 introduces a feature that supports connection to Teradata through OAuth authentication.
The Entra ID (formerly Azure AD) OIDC for Teradata Single Sign-On is the simplest data source connection for users because it leverages Strategy authentication and users only need to sign in once.
Before following the steps below, you must configure the OAuth integration with Entra ID to create OAuth applications. See Teradata's documentation for more information.
When you create your Teradata Azure application, add the UPN claim. Strategy uses UPN to map to user ID.
Enable Strategy Web OIDC with Entra ID
- Establish Trust Between the Web Server and Intelligence Server:
- Log in to Strategy Web.
- Connect to the Intelligence Server.
- Select your Intelligence Server and in Server Properties, click Setup.
- Enter your administrator account and password
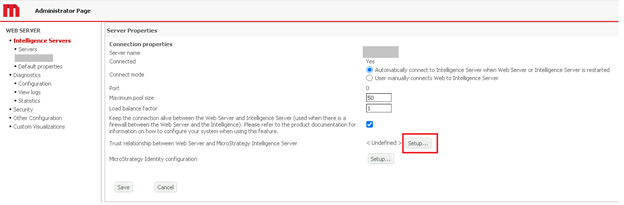
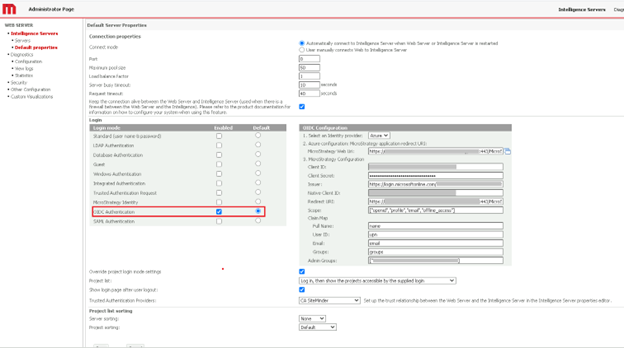
- Select the OIDC Authentication Enabled check box and choose Default.
- Enter your OIDC Configuration information:
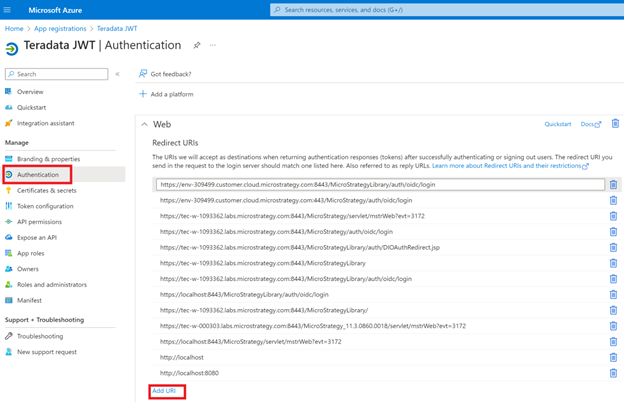
- Add your Strategy Redirect URI to Azure:
- In Entra ID, go to the Teradata Client Application and click Authentication in the left pane.
- Expand the Web tab and click Add URI.
- Enter your Strategy redirect URI.
- Click Save.
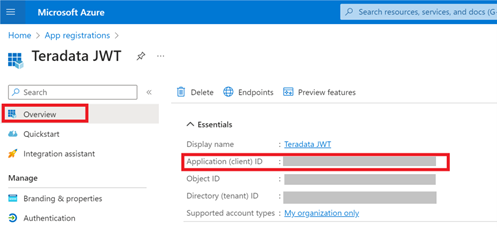
- Find the Client ID:
- In Entra ID, go to App registrations and click Overview in the left pane.
- Locate Application (client) ID.
- Copy and paste it into your Strategy OIDC Configuration.
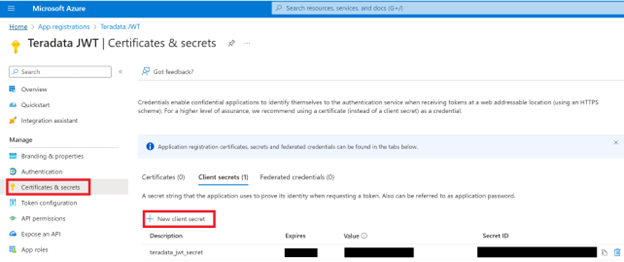
- Find the Client Secret:
- In Entra ID, go to App registrations and click Certificate & secrets in the left pane.
- Locate your client secret or if necessary, click New client secret.
- Copy and paste it into your Strategy OIDC Configuration.
- Find Issuer:
- In Entra ID, go to App registrations and click Overview in the left pane.
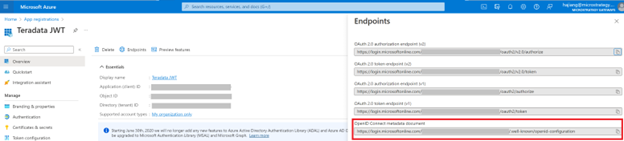
- Open the URL for the OpenID Connect metadata document and copy and paste the Issuer value into your Strategy OIDC Configuration. For example:
https://login.microsoftonline.com/[Directory tenant ID]/v2.0.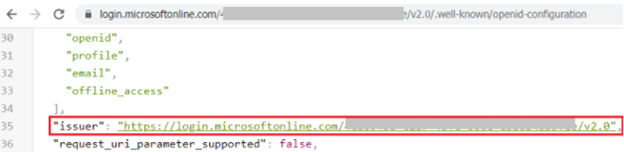
- In Native ID, paste the same value as Client ID.
- Leave the Redirect URI and Scope default values.
- In Claim Map enter the following values:
- Full Name: name
- User ID: upn
- Email: email
- Groups: groups
- Find Admin Groups:
- In Entra ID, go to App registrations > Groups > Overview.
- Locate the Object Id.
- If the Object Id is a set value, only users in that group can access mstrWebAdmin pages.
- Add your Strategy Redirect URI to Azure:
- Restart Tomcat.
Enable Strategy Library OIDC with Entra ID
- Create or modify
MicroStrategyLibrary\WEB-INF\classes\auth\Oidc\OidcConfig.json:
{

  "iams":[{

    "clientId":"XXXXXXX",

    "clientSecret":"XXXXXXX",

    "nativeClientId": "XXXXXXX",

    "id":"test",

    "issuer":"https://login.microsoftonline.com/XXXXXXX/v2.0",

    "redirectUri":"https://XXXXXXX/MicroStrategyLibrary/auth/oidc/login",

    "blockAutoProvisioning": true,

    "claimMap": {

      "email": "email",

      "fullName": "name",

      "userId": "upn",

     "groups": "groups"

    },

    "default": true,

    "mstrIam": true,

    "scopes": [

      "openid",

      "profile",

      "email",

      "offline_access"

    ],

    "vendor": {

      "name": "MicroStrategy IAM",

      "version": "Azure AD"

    }

  }]

} -
For clientId, clientSecret, nativeClientId, and issuer, use the same values that you entered in Enable Strategy Web OIDC with Entra ID.
-
For redirectUri, replace
xxxxxxwith<FQDN>:<port>and add the URL to Entra ID > Teradata > Teradata OAuth Client Application > Authentication > Web Redirect URLs.
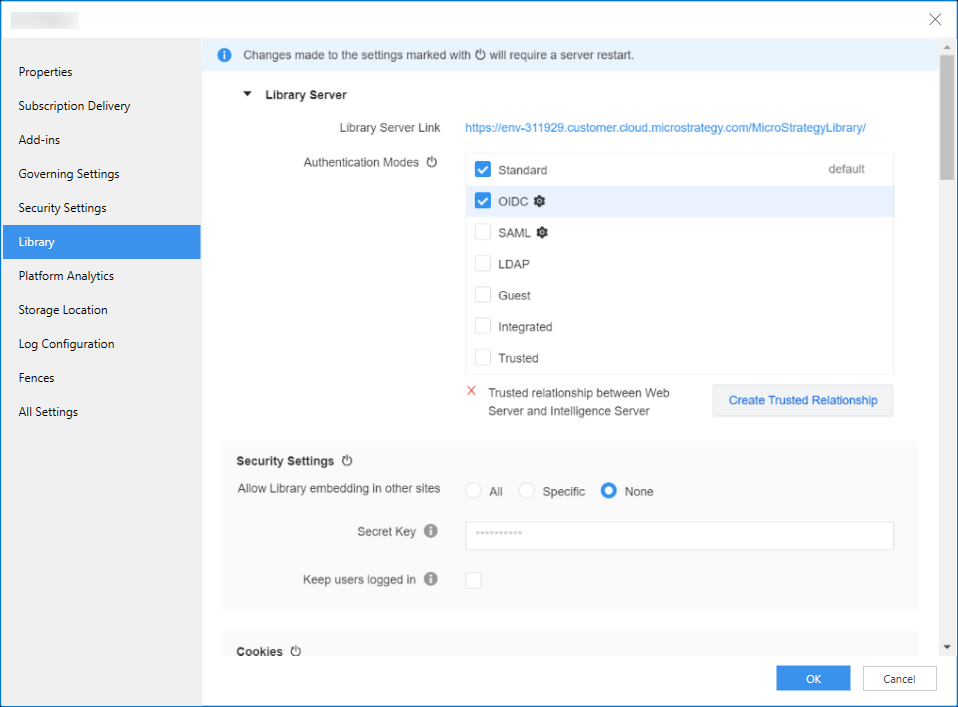
- Set the OIDC authentication mode in Library Admin or Workstation:
- Log in to Strategy Library Admin:
- Connect to the Intelligence Server.
- Go to the Library Server tab and under Authentication Modes, select the OIDC check box.
- Click Create Trusted Relationship.
- Enter your administrator username and password.
- Log in to Strategy Workstation:
- Connect to your environment.
- Right click your environment and click Properties.
- In the left pane, click Library.
- Select the OIDC check box and click Create Trusted Relationship.
- Click Ok.
- Log in to Strategy Library Admin:
- Restart Tomcat.
Create a Database Role with OAuth Authentication
After you copy the ClientID, ClientSecret, Tenant ID, Authorization URL, and Token URL, you can connect to Teradata using OAuth.
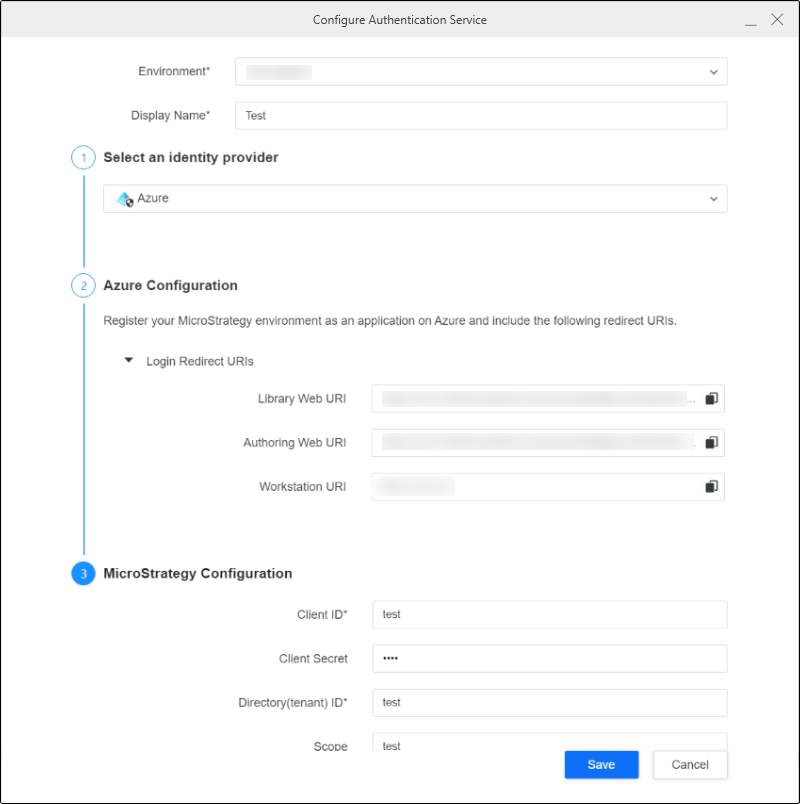
Configure Authentication Service Using Enterprise Security
- Open the Workstation window with the Navigation pane in smart mode.
- In the Navigation pane, click
 , next to Enterprise Security.
 - Enter a Display Name.
- Choose the Azure identity provider.
- Copy the login redirect URIs.
- In Entra ID, go to Authentication and click Add URI.
- Enter the URIs that you copied earlier.
- Click Save.
- In Workstation, enter the Client ID, Client Secret, OAuth URL, and Token URL.
- Click Save.
Create a Database Role Using Data Source
- Open the Workstation window.
- In the Navigation pane, click , next to Data Sources.
- Choose Teradata.
- Expand the Default Database Connection drop down and click Add a new database connection.
-
Enter a Name and Server Name.
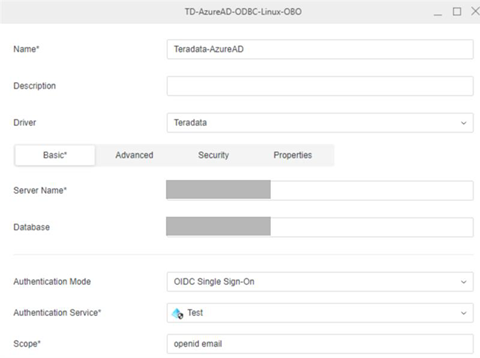
- In Authentication Mode, choose OIDC Single Sign-On.
- In the Authentication Service drop-down, choose the Azure authentication service you created.
- Enter a Scope.
- Click Save.
Connect to Teradata Database
- Open the Workstation window.
- Make sure the environment is using the Strategy OIDC authentication mode. In the Navigation pane, click Environments.
- Right-click the environment and choose Edit Environment Information.
- Verify that Authentication Mode is set to Strategy OIDC.
- Log in to your Strategy environment using your Entra ID user name and password.
- Test the data source in either Library or Workstation.
Test the Data Source in Library
-
Open Strategy Library and click Log in with OIDC.
-
In the toolbar, click
 and choose Dashboard.
 -
Click Blank Dashboard.
-
Click Create.
-
Click New Data and select the Teradata gateway.
-
Choose Select Tables and click Next.
-
Select the data source you created. The projects and datasets list appears.
Test the Data Source in Workstation
- In the Navigation pane, click , next to Datasets.
- Select the Teradata gateway.
- Select the data source you created. The dataset appears.