Strategy ONE
Setting Up and Using the Single Sign-On Sample
Single sign-on (SSO) is a mechanism that allows users to access all the computers and systems to which they have permission by a single action of user authentication and authorization—without having to log in separately for each system. SSO normally requires a centralized identity management system or authentication server to validate user identities, determine which resource users have permission to access, and then pass the authentication information on to the requested application and establish a session for the user.
To illustrate a typical simple single sign-on scenario, the MicroStrategy SDK includes a Single Sign-on (SSO) Sample. This sample has two basic parts:
-
The main part of the sample is a custom implementation of a MicroStrategy External Security Module (SSOESM.java), which provides the code needed to implement single sign-on with an external authentication mechanism. See Single Sign-on Sample: Custom ESM Code Explanation for a detailed explanation of the code in the custom ESM, SSOESM.java.
-
For demonstration purposes, the sample also includes a simple web application (sso.war), which simulates the basic functionality of an authentication server or identity management application. This sample web application provides a better understanding of the behavior of the custom ESM code by letting you see it in action.
The SSO Sample is useful if you want an identity management application to provide the authentication for your MicroStrategy Web users. In this case, when a user requests a MicroStrategy Web page, the identity management application authenticates the user, checks to see if he or she has access to MicroStrategy Web, and if so sends the request to MicroStrategy Web with a token. MicroStrategy Web must be able to use this token to validate the user and handle the request. The code in the custom ESM class in the Single Sign-on Sample provides an example of how to do this.
In order for this ESM to work properly, any initial request to MicroStrategy Web must include a parameter corresponding to the authentication server token. This parameter is normally passed as part of the URL. The name of this parameter must be defined in ssoesm.properties (default is SSO_TOKEN_NAME), and the value must be the token returned from the authentication server. If a MicroStrategy Intelligence Server session does not exist and an authentication server token is not found in the request or is not valid, then the ESM tells MicroStrategy Web to redirect the request to a custom login page. This custom login page is also defined in ssoesm.properties (default is CUSTOM_LOGIN_URL). Finally, the ssoesm.properties file must define a URL that is used to authenticate the authentication server token (default is SSO_URL).
The sample authentication server provided as part of this sample handles login and authentication.
-
login.jspis the page for logging in to the authentication server. On this page, users enter credentials for an account on the authentication server. After the server authenticates the user, it generates a token and passes the token to MicroStrategy Web. MicroStrategy Web calls the custom SSO ESM to validate the token. To validate the token, the custom SSO ESM sends a request toauthenticate.jsp.
-
authenticate.jspdetermines whether the token is valid. If it is valid, MicroStrategy Web gives the user access to the requested URL; otherwise, it redirects the user to the custom login page defined inssoesm.propertiesfile.
You can use this sample as the basis for creating your own single sign-on environment that uses a third-party-provided authentication mechanism. You can customize and extend the External Security class in this sample to meet your requirements, modify the properties file as required, and replace the sample web application with the real authentication server used in your production environment.
The External Security Sample Application was included in prior versions of MicroStrategy SDK, but it was packaged— and, thus, installed— differently. The installation directions in this topic apply only to the sample application packaged as a plug-in.
The sections below describe how to set up and use the Single Sign-on Sample. Two other topics— SSO Sample: Custom ESM Code Explanation and SSO Sample: Custom Properties File— describe the code in the custom ESM class and the properties file.
Setting Up the Single Sign-on Sample
The file needed for this sample are provided in a plug-in, called SSOSample, which is located in the CustomizationPlugins/AdvancedScenarios folder insides the SDK installation directory. Just as you do with any customization plug-in, you must copy the SSOSample plug-in to the plugins folder inside your MicroStrategy Web installation directory.
This plug-in contains the following files.
-
SSOESM.java
Custom External Security Module (ESM) class provided for the SSO Sample
-
ErrorInfo.java
File containing the error codes and error messages used in the SSO Sample
-
ssoesm.properties
Properties file for the custom ESM class used in the SSO Sample
A sample web application that simulates an authentication server in the SSO Sample is also provided. This file is called sso.war. To set up the SSO Sample, deploy the sso.war file (located by default in the samples\java\sso folder inside the MicroStrategy SDK installation) to your application server. This sample application acts as the authentication server for the SSO Sample.
In order to use the sample as-is, the sso.war file (that is, the sample authentication server) must be deployed to a Tomcat server on the same machine where MicroStrategy Web is installed. If the WAR file is deployed to a different machine, the values in the custom properties file must be changed to reflect the different location.
Using the Single Sign-on Sample
To test the functioning of the SSO Sample, do the following:
-
Open a browser and request the login page of the sample web application, login.jsp. For example, if you deployed the application on your local machine with 8080 as the port number, use the following URL to invoke the login page:
Copyhttp://localhost:8080/sso/jsp/login.jspWhen the login page opens, replace YOUR_ISERVER in the URL under MicroStrategy Page Requested to the name of the computer where your MicroStrategy Intelligence Server is installed

-
Log in to the authentication server using valid authentication credentials that have access to the authentication server. In this sample, log in as test1/test1.

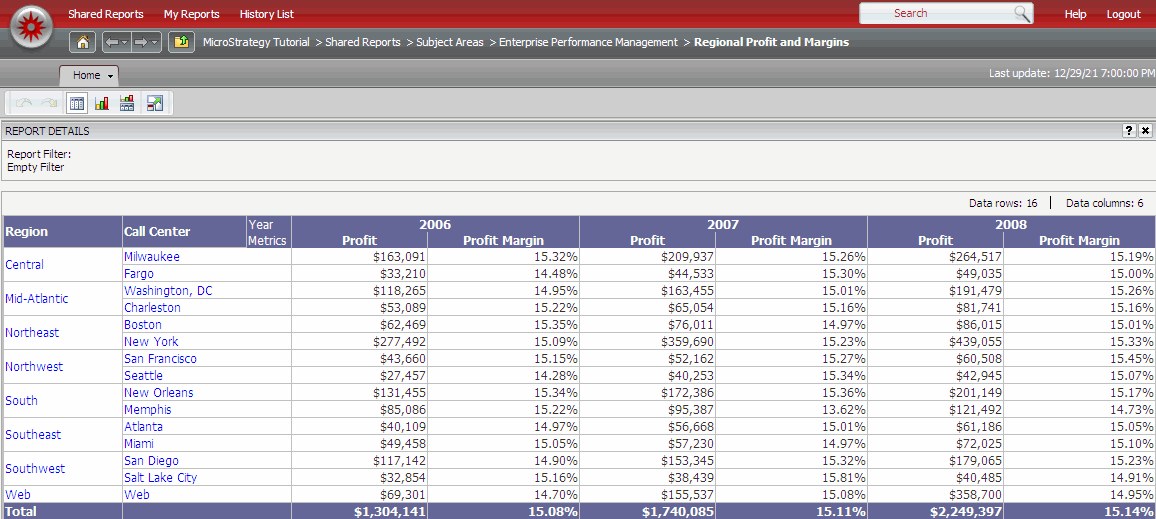
The user account with a userID of test1 and a password of test1 is a valid account on the authentication server and is also authorized to use MicroStrategy Web. When you enter these credentials and click "Login", the requested MicroStrategy Web page is displayed.

-
Close the browser and reopen it, again requesting the login page of the sample web application, login.jsp. (Follow the instructions in step 1 above to open the page and modify the URL to add your Intelligence Server location.)
-
Log in to the authentication server using valid authentication credentials that do not have access to MicroStrategy Web. In this sample, log in astest2/test2.
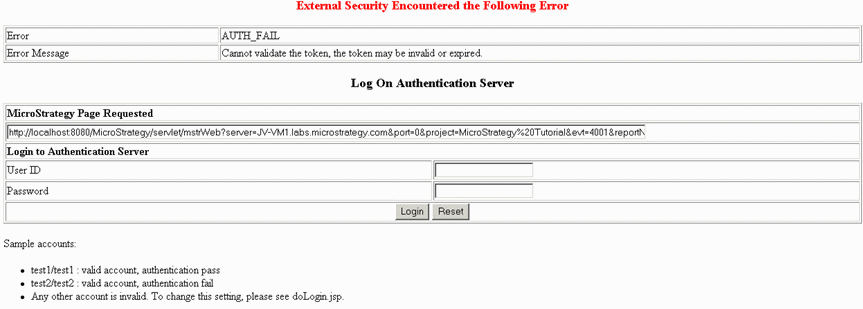
The user account with a userID of test2 and a password of test2 is a valid account on the authentication server but is not authorized to use MicroStrategy Web. When you enter these credentials and click "Login", the login page is displayed with a note at the top indicating that authorization failed and this user account was denied access to MicroStrategy Web.

-
Close the browser and reopen it, again requesting the login page of the sample web application, login.jsp. (Follow the instructions in step 1 above to open the page and modify the URL to add your Intelligence Server location.)
-
Log in to the authentication server using invalid authentication credentials. In this sample, you can log in as anything other thantest1/test1ortest2/test2. For example, you can log in astest3/test3.
Any user account other than test1/test1ortest2/test2 is an invalid account on the authentication server. When you enter any such credentials and click "Login", the login page is displayed with a note at the top indicating that this is an invalid user account and login has failed.

