Strategy ONE
Configure the MicroStrategy Connector
The MicroStrategy connector allows you to fetch data from reports or cubes that reside on other MicroStrategy projects or environments.
To use the connector, you must first perform the following steps to configure the connector.
- Set the Community Connectors Application URL
- Modify the whitelist.txt File
- Confirm the Connector URL
- Enable CORS Setting or add allowed origins
Set the Community Connectors Application URL
Administrator privileges are required.
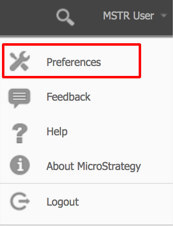
- In Strategy Web, click the username drop-down and select Preferences.
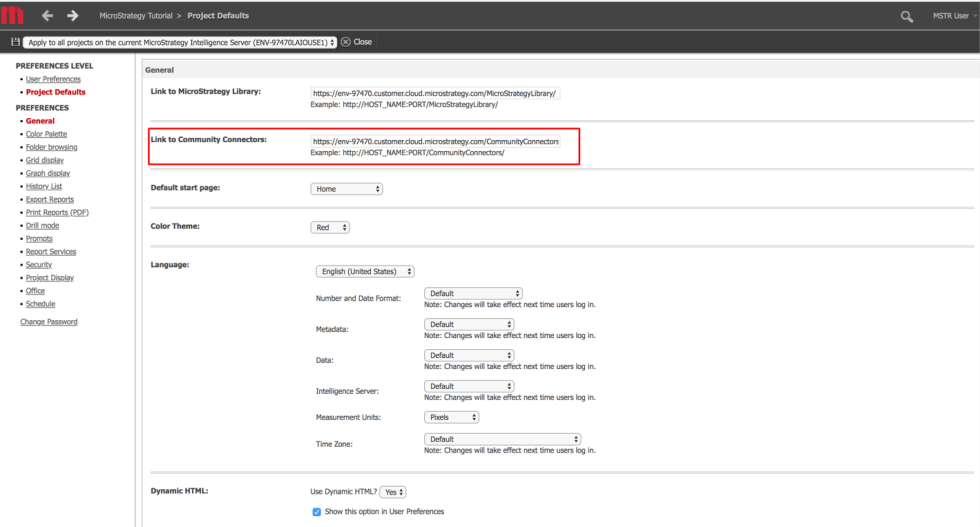
- Under Preferences Level, click Project Defaults.
- Enter your Strategy Community Data Connectors application URL in Link to Community Connectors.
The URL format: https://[HOST_NAME]:[PORT_NUMBER]/CommunityConnectors/
- The HOST_NAME is the host name of the machine you have the Community Connectors application installed on.
- The PORT_NUMBER is the port number that your web server listens to. Use only if required.
- The HOST_NAME is the host name of the machine you have the Community Connectors application installed on.
- Click Apply.
Modify the whitelist.txt File
-
Navigate to your Community Connector server and open the whitelist.txt file.
This is usually in Tomcat, in the file path [Tomcat]\webapps\CommunityConnectors\WEB-INF\whitelist.txt.
-
Add a new line and enter your Strategy Web server hostname.

-
If the connector is deployed with cluster mode, you must add the Strategy Web server hostname to the whitelist.txt file for each connector.
If your Web server is deployed with cluster mode, then use the web load balancer's hostname in the whitelist.txt file.
Confirm the Connector URL
- Web
- Workstation
- Open Strategy Web.
- Click Create > Add External Data.
-
Locate the Strategy Connector.

-
Hover over the connector and click Edit Connector.

-
Ensure your Connector URL has /mstr-native/ appended to the end. If it does not, add it to your URL.
https://[HOST_NAME]:[PORT_NUMBER]/CommunityConnectors/mstr-native/
- Click Save.
- Open Strategy Workstation.
- Create a new dashboard.
- Go to Add Data > New Data.
-
Locate the Strategy Connector.
-
Hover over the connector and click Edit Connector.
-
Ensure your Connector URL has /mstr-native/ appended to the end. If it does not, add it to your URL.
https://[HOST_NAME]:[PORT_NUMBER]/CommunityConnectors/mstr-native/
- Click Save.
You can now use the MicroStrategy Connector. For steps, see How to Use the MicroStrategy Connector.
Enable CORS Settings
To allow the embedding MicroStrategy content in an existing or separate web server, ensure Cross-Origin Resource Sharing (CORS) settings are enabled in your cloud environment.
You need a Strategy Library Server using the HTTPS protocol.
Chrome Web Browser version 80 and above introduces new changes which may impact embedding. For more information, see KB484005: Chrome v80 Cookie Behavior and the Impact on MicroStrategy Deployments.
- From the cloud environment's welcome email, click Access MicroStrategy Platform.
- Under More Resources, hover over MicroStrategy Library and click Configure.
- On the Library Admin page, select Library Server from the menu bar.
- Under Security Settings, select All.
- Click Save.
- Restart the Library application.
- From the Library Admin page, select Library Server from the menu bar.
- Under Security Settings, select All.
- Click Save.
- Restart the Library application.
Add Allowed Origins
Alternatively, you can add individual hosts to the Allowed Origins field of the Library Server to verify that stability is preserved and improved when CORS is enabled.
- From the cloud environment's welcome email, click Access MicroStrategy Platform.
- Under More Resources, hover over MicroStrategy Library and click Configure.
- On the Library Admin page, select Library Server from the menu bar.
- Under Security Settings, specify origins by input of URLs.
- Click Save.
- Restart the Library application.
Limitations
The Strategy connector creates a cube from a snapshot of data from the original data source, such as a cube or report. It references the original data source it was created from. When you move the connector cube across environments or projects using the package manager, the underlying data source remains unchanged. The main purpose of the connector is to create refreshable snapshots of data. It is not intended to be used as a migration tool.
Supported Authentication Types
The Strategy connector supports standard and LDAP authentication.
Import Support
Reports
| Report Type | Supported by Strategy Connector? |
|---|---|
|
Freeform SQL |
No |
|
Graph |
Yes |
|
Grid |
Yes |
|
Grid Graph |
Yes |
|
Intelligent Cube |
Yes |
|
MDX Cube |
Yes |
|
SQL |
No |
Datasets
| Type | Supported by Strategy Connector? |
|---|---|
|
Dashboard Compound Grid |
No |
|
Dashboard Custom Visualizations |
No |
|
Dashboard Free-form Layout |
No |
|
Dashboard Out-of-the-box Visualizations |
No |
|
Intelligent Cube Live Connect |
Yes |
|
Intelligent Cube MTDI |
Yes |
|
Intelligent Cube OLAP |
Yes |
Documents
Documents are not supported by the Strategy connector.
Other
| Type | Supported by Strategy Connector? |
|---|---|
|
All attribute forms format types |
Yes Note: When you import geo attributes (longitude and latitude), they will not be properly set after import but can be set in the Prepare Data window |
| All metric types | Partial |
|
Consolidations |
Yes |
|
Custom groups |
No |
|
Derived elements |
Yes |
| Edit previously imported data | Yes |
| Page-by reports (All pages) | No |
|
Page-by reports (First page) |
Yes |
|
Prepare data before import (attributes, metrics, attribute elements) |
No You can only select which attributes and metrics to import, sorting is supported |
|
Preview data before import |
Yes |
|
Prompted reports with and without default answers |
No |
|
Reports with system and nested prompts |
No |
|
Reports with view filters/reports, derived metrics |
No |
|
Select attribute forms to import |
No |
| Select how attribute form names should be imported (For example, form name only) | No |
| Select totals and subtotals to not import | No |
|
Totals and subtoals |
No |