MicroStrategy ONE
Connect to PayPal Using JDBC
Connecting to PayPal using JDBC is only supported on MicroStrategy ONE Update 11 or earlier. If you are using MicroStrategy ONE Update 12 or later, see Connect to PayPal Using ODBC.
PayPal is an online payment system that supports online money transfer, invoice sending and receiving, and payment transactions. MicroStrategy ships the PayPal JDBC connector for customer to connect PayPal as data source when doing data import on Web and Workstation.
The PayPal JDBC driver supports standard SQL-92 syntax and functions but is limited in write back and performance. MicroStrategy will support in-memory data import and choose to process data on our side.
- Data Retrieve Mode: JDBC Call Only
- Data Import supported: Select Tables, Free Form SQL, Query Builder (In-memory)
JDBC Connection URL
MicroStrategy ships the PayPal JDBC driver to connect PayPal as a data source with the following connection methods. You can find them on the data source dialog when importing data.
- Using OAuth 2.0 authentication client ID and client secret
JDBC;DRIVER={com.simba.paypal.jdbc42.CLJDBCDriver};URL={jdbc:paypal://;host=[host];port=[port];Auth_Client_ID=[Client_ID];Auth_Client_Secret=[Client_secret];Auth_Type=OAuth 2.0} - Using access token
JDBC;DRIVER={com.simba.paypal.jdbc42.CLJDBCDriver};URL={jdbc:paypal://;host=[host];port=[port];Auth_Type=OAuth 2.0;Auth_AccessToken=[Access_Token]}
See How to Get PayPal Connection String Parameters for steps to acquire the correct parameters.
PayPal may impose a rate limit if it detects abusive traffic patterns. Go to the PayPal website for more information.
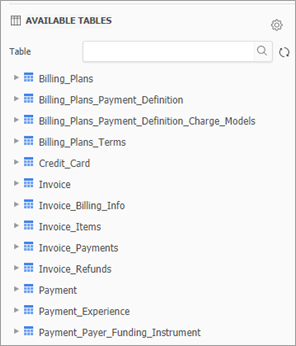
JDBC Schema Tables
PayPal stores data in structures which do not follow the rules of traditional tables and columns. The JDBC maps PayPal data into its designed relational schema 'PayPal' with 36 fixed schema tables. The mapping method is complicated, so lower performance is expected when querying tables with large amounts of data.
Configure PayPal using JDBC on Web and Workstation
- Workstation
- Web
See Create and Edit Data Sources for steps to create a new data source and connection.
- Choose Add Data
 > New Data.
 - Find the PayPal connector from the data source list.
- Click the connector.
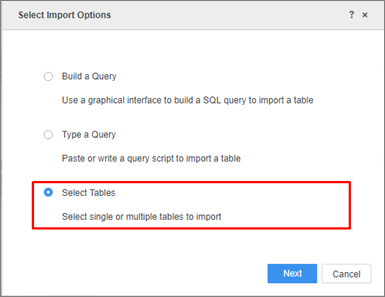
- Choose Select Tables, Type a Query, or Build a Query to import data.
It is recommended to use Select Tables to reduce joins on the driver side for best performance.
- In the Data Source interface, select DSN-less Data Source and choose PayPal for both Database and Version. Use one of the following methods to configure the DSN-less connection:
Standard Access: Enter the required fields Host Name, Port Number, Client ID, and Client Secret.
For Standard authentication, remove https:// from the host name.
- Access Token: Enter the required fields Host Name, Port Number, and Access Token.
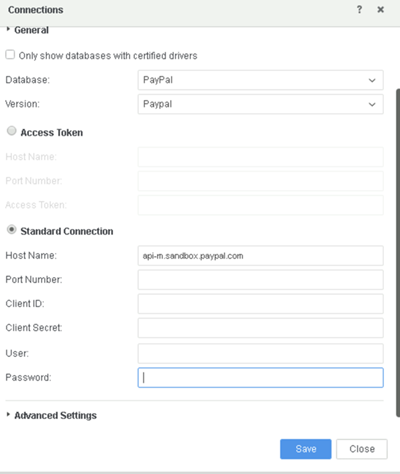
- Edit the Connection String: Click Show connection string and select Edit connection string. Enter the connection information of the JDBC connection string to connect.
Ignore Driver. Type any character in the User and Password fields, as they will not be used in the connection.
- Click OK.
- Click on the new Data Source to connect.
In-Memory Data Import
After creating and connecting to a PayPal data source, you can retrieve data through JDBC and then publish a cube for dashboards, reports, and documents.
The examples below are using the Select Tables import option.
- Click your PayPal data source and select the tables you want to import.
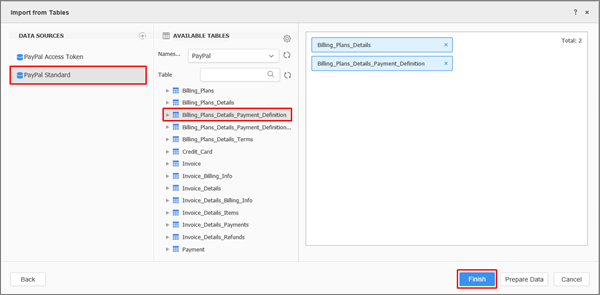
- Click Prepare Data.
- Click Finish.
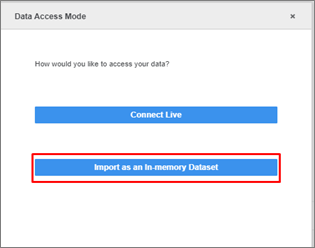
- Select Import as an In-memory Dataset Mode to publish a cube.
How to Get PayPal Connection String Parameters
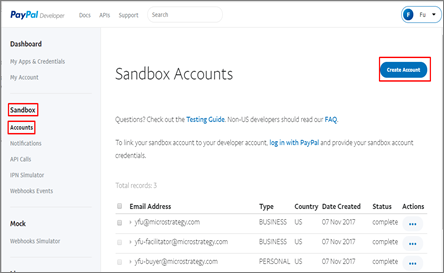
- Prepare a sandbox or a live developer account that has access to API call.
For Standard authentication, remove https:// from the host name.
In this case:
- Sandbox (Host) Link: sandbox.paypal.com
- Developer Link: developer.paypal.com
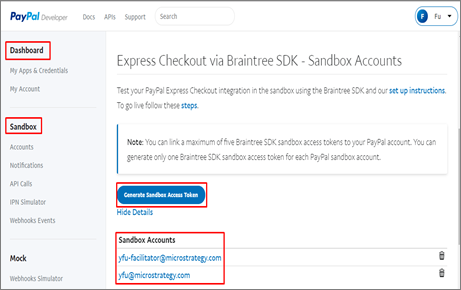
- Create business and personal accounts from Sandbox > Accounts > Create Account.
- Click Sandbox > Generate Sandbox Access Token to link to your business sandbox account and generate an Access Token. Click your sandbox account to see the access token list.
- Click My Apps & Credentials.
- Enter the app name and link it to your Sandbox Developer account.
- Click Create App. Open the app from the My Apps & Credentials page to view the Client ID and Client Secret for the app.
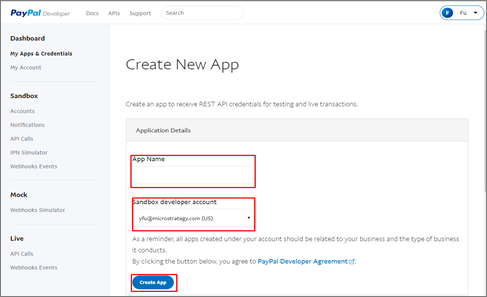
- Open the app from the My Apps & Credentials page to view the Client ID and Client Secret for the app.
If your access token does not work, you can use the Client ID and Client Secret generated above to create a short-term access token using the Postman app by following the instructions below. This access token will expire 8 hours after creation.
Generate an Access Token with Postman
- Download the Postman app.
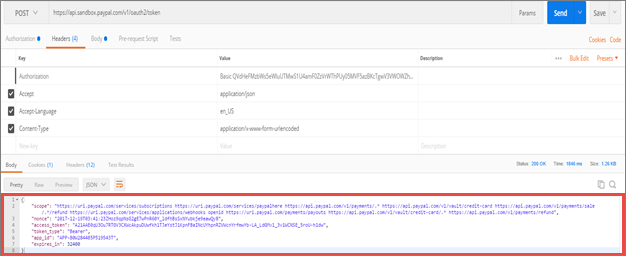
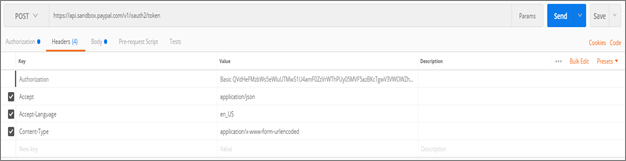
- Create a POST request with the following information:
- POST to URL: https://api.sandbox.paypal.com/v1/oauth2/token
- Authorization: Basic Auth
- Username: Client ID
- Password: Client Secret

- In the Headers tab, enter the following information:
- Accept: application/json
- Accept-Language: en_US
- Content-Type: application/x-www-form-urlencoded
- In the Body tab:
- Select the application/x-www-form-urlencoded option
- grant_type: client_credentials
- Click Send.