MicroStrategy ONE
Add Images to Cards
The Profile template allows you to add images to your cards. You have two options for adding images:
HyperIntelligence supports the following formats:
- JPEG
- PNG
- GIF
- BMP
For optimal resolution, use square or circular images that are at least 80 x 80 pixels for your cards. Any values below this image will affect the image's resolution.
Additionally, images must be stored on a public repository, such as a website or storage drive that is open to the Internet. If the website or drive requires a log in or has a firewall blocking access to the Internet, images may not load properly in the card.
Using HTML Image Tags
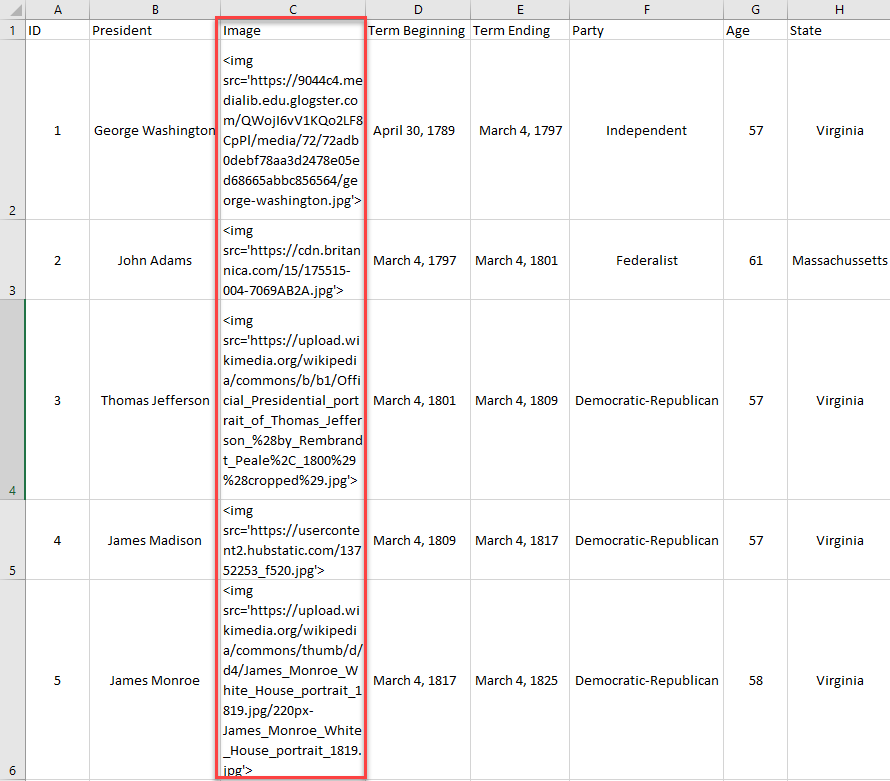
One way to add images to your Profile cards is by including an HTML img tag to your attributes. Tags are displayed as <img src=“example_path”>, where "example_path" is an image URL. Before importing your data, add a column called Images containing the image tags.
If you are using MicroStrategy ONE (March 2024) or later, you need to enable the Enable granular control of HTML and JavaScript content setting to use HTML image tags. For more information, see Disallow Custom HTML in Dashboards.
-
Create a dataset with a column specifically for images. Add your HTML img tags to this column.
- From the Workstation navigation, next to Datasets, click Create New Dataset.
- Upload your dataset to Workstation and click Prepare Data.
- Create a multi-form attribute that contains the Image column as form. For steps to create a multi-form attribute, see Allow Alternate Forms of a Keyword.
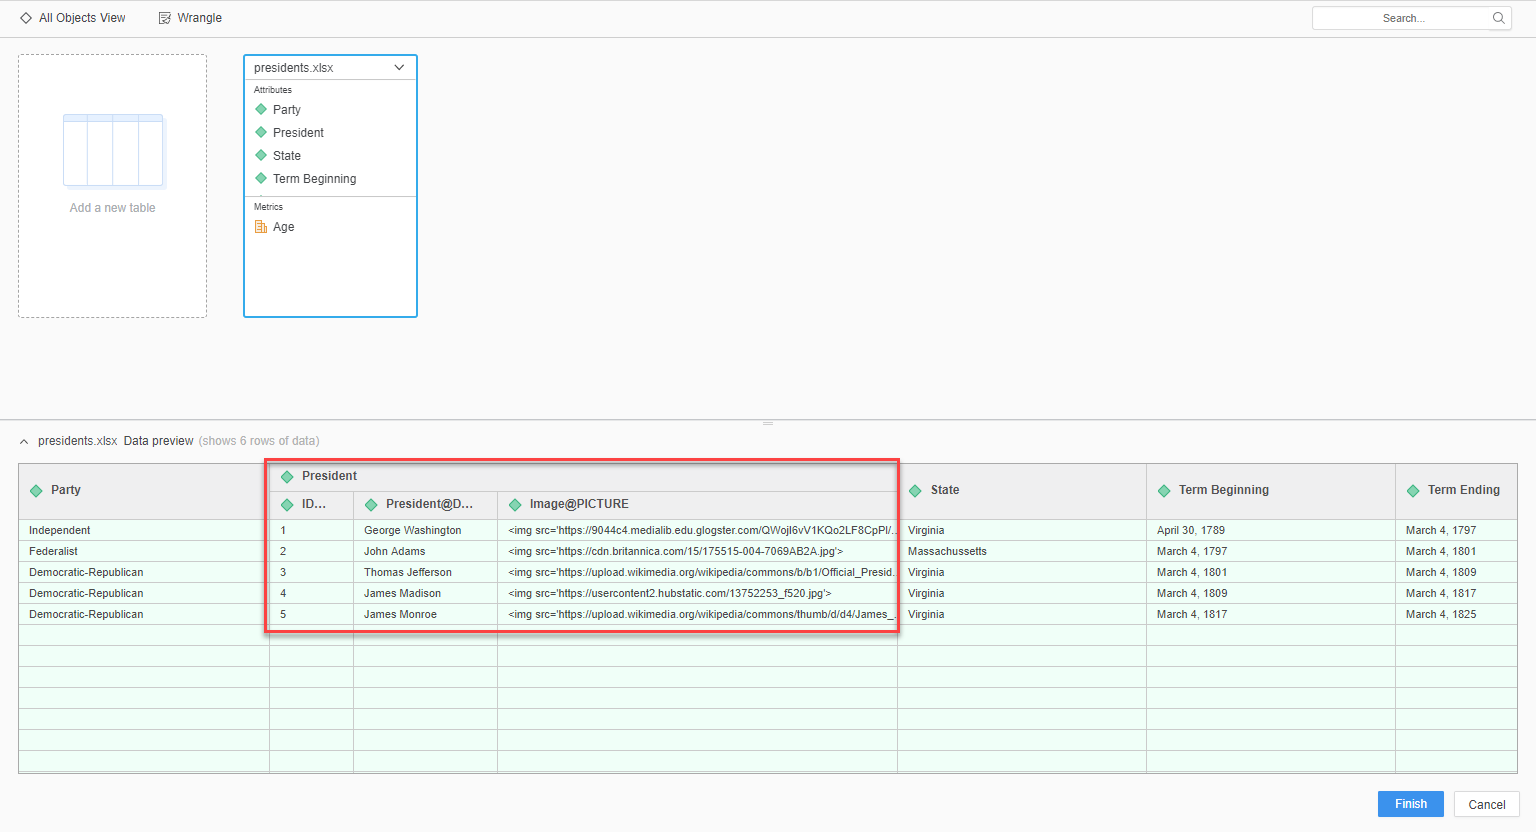
- Right-click the Image form and select Change Data Type > HTML Tag.
- Click Finish.
Now in a Profile card, you can click the image bubble and select the Image form. The Image form may appear as Synonym X. To see an example of adding HTML image tags, see KB483140: Best Practices and an Example of Adding Images to HyperCards.
Using Image URLs
To use image URLs, you have to create a dataset specific for Profile cards. In your dataset, set the attribute form type to image using MicroStrategy Developer to add the information to the database.
There are five overarching steps to use image URLS:
- Create Tables Using the MicroStrategy Database Query Tool
- Add the Table to Your Warehouse Catalog
- Create an Image Attribute
- Create Metrics for Your Dataset
- Create an OLAP Cube
The following instructions assume you have a Cloud Console environment.
Create Tables Using the MicroStrategy Database Query Tool
- Using Remote Desktop, connect to your developer machine.
-
Connect to your VNC instance using the login information from the Welcome to MicroStrategy on AWS email.
- Go to Applications > System Tools > Terminal.
- Open the folder containing the MicroStrategy Database Query Tool by entering the following command:
cd /opt/mstr/MicroStrategy/bin/
- Run the query tool by using the command:
./mstrdbquerytool
- Log into your metadata warehouse using your environment's username and password in the Getting Started with MicroStrategy email.
-
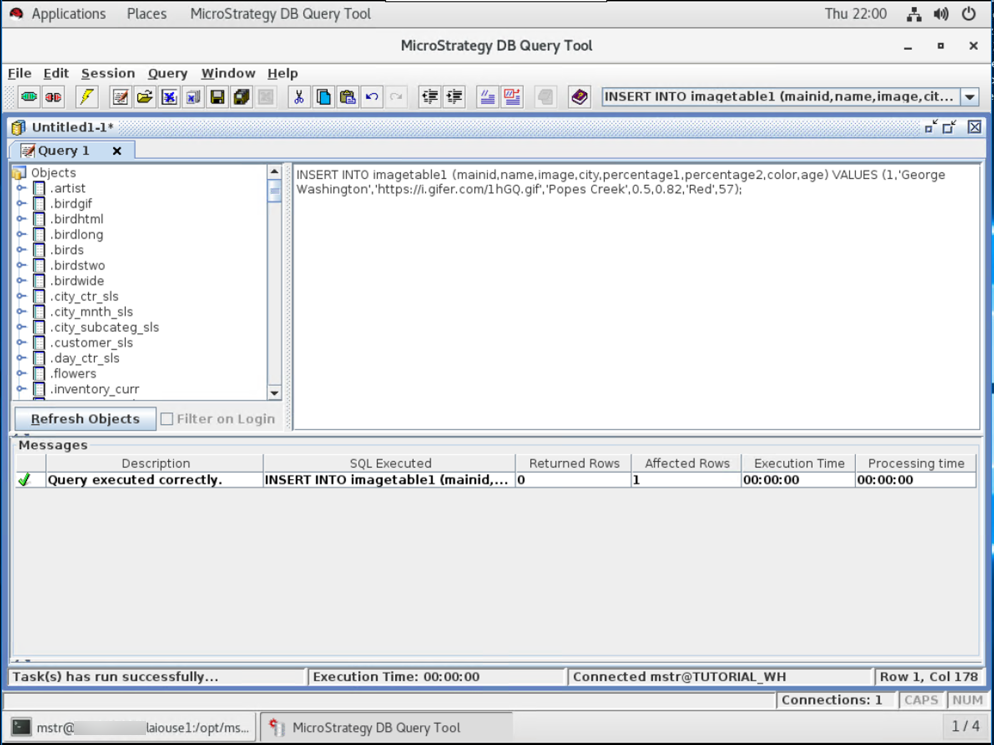
Create a table called ImageTable1.
How do I create a new table in my database?To add a table to the MicroStrategy database, the following query can be used:
CREATE TABLE IF NOT EXISTS `[table name]` (
	`[main ID name]` [data type] NOT NULL auto_increment,
	`[column1 name]` [data type],
	`[column2 name]` [data type],
			…..
	`[columnX name]` [data type],
	PRIMARY KEY(`[main ID name]`)
);
Replace data type with your selected data type, such as:
- int(#): Specifies a positive or negative integer. The # must be between 1 and 11 and specify how many digits the integer can have.
- varchar(#): Specifies a variable-length string of any text. The # must be between 1 and 255 and specify how many characters the string can have.
- numeric(S,D): Specifies a positive or negative decimal number. The S is the number of significant digits that can be displayed and D is the number of decimals included in the number. It’s recommended this datatype is used for data that must avoid rounding errors, such as financial data.
NOT NULL can also be added to the end of any line to require the column to have a value. The IF NOT EXISTS portion can be omitted; however, this prevents an existing table from being overwritten.
The `[main ID name]` [data type] NOT NULL auto_increment, creates a unique value to identify each row that automatically increases. This line can be omitted; however, a different column must have unique values to act as the primary key.
The PRIMARY KEY(`[main ID name]`) is a required line that must name a NOT NULL column. All values are required to be unique.
An example query is:
CREATE TABLE IF NOT EXISTS `employees` (
		`mainid` int(11) NOT NULL auto_increment,
		`name` varchar(255),
		`salary` numeric(8,2),
		PRIMARY KEY(`mainid `)
);
CREATE TABLE IF NOT EXISTS `employees2` (
		`employeeID` int(6) NOT NULL,
		`name` varchar(255),
		`salary` numeric(8,2),
		PRIMARY KEY(`employeeID`)
);
-
Add a row for your image URLs.
How do I add a row to my table?A query to add a table is:
INSERT INTO [tablename] ([column1 name],[column2 name],…,[column name]) VALUES ('value1','value2',…,'valueX');Values must appear in the same order as their column names. When adding values, text values require apostrophes.
For example:
INSERT INTO employees (name,salary) VALUES (‘John Smith’,50000.00);
INSERT INTO employees2 (employeeID,name,salary) VALUES (15000,’John Smith’,50000.00);
If your table contains an auto_increment column, omit it from the query.
Add the Table to Your Warehouse Catalog
-
Open MicroStrategy Developer and select your project.
If you are running MicroStrategy Developer on Windows for the first time, run it as an administrator.
Right‑click the program icon and select Run as Administrator.
This is necessary in order to properly set the Windows registry keys. For more information, see KB43491.
- Click Schema > Warehouse Catalog.
- Under Tables available in the database instance, double-click ImageTable1. Your table is now in your project.
If your table does not appear, click
 Refresh.
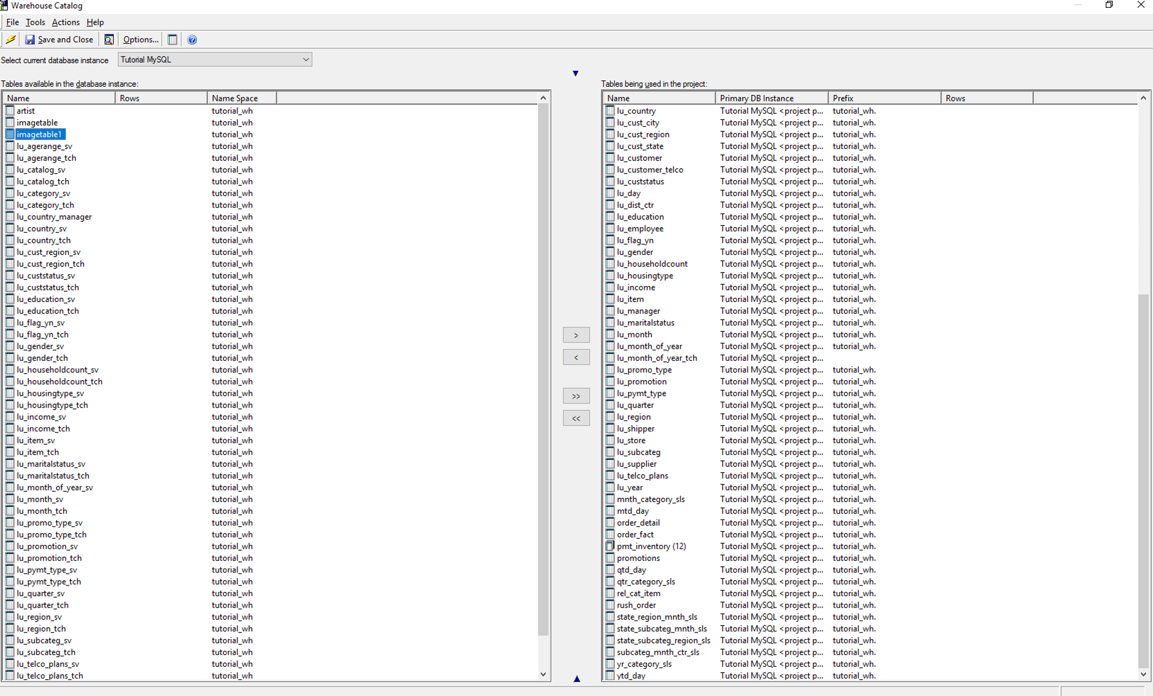
- Click Save and Close.
Create an Image Attribute
- In your project, open the folder containing your attributes.
- Click File > New > Attribute.
- In the New Expression Form editor, click the drop-down and select ImageTable1.
- Under Available columns, select an attribute ID and click OK.
Do not select the Image column.
- In the Create New Attribute Form editor, under Form Category, use the drop-down and set Category Used to ID.
- Click New to create another attribute form. This is the DESC form of the attribute.
- In the New Expression Form editor, click the drop-down and select ImageTable1.
-
Under Available columns, select an attribute DESC and click OK.
Do not select the Image column.
- In the Create New Attribute Form editor, under Form Category, use the drop-down and set Category Used to DESC.
- Click New to create another attribute form. This is the Image form of the attribute.
- In the New Expression Form editor, click the drop-down and select ImageTable1.
- Under Available columns, select the Image column and click OK.
- In the Create New Attribute Form editor, under Form Category, use the drop-down and set Form Format to Picture.
- Click OK.
- Click Save and Close.
You can create multiple image attributes.
Create Metrics for Your Dataset
- In your project, open the folder containing your metrics.
- Click File > New > Fact.
- In the New Fact Expression editor, click the drop-down and select ImageTable1.
- Under Available columns, select a column to use as a fact and click OK.
- Click Save and Close. Repeat these steps to add all intended metric values as facts.
- Click File > New > Metric.
- Open the folder where you saved your facts. Double-click a fact to add it to the metric as a Sum value.
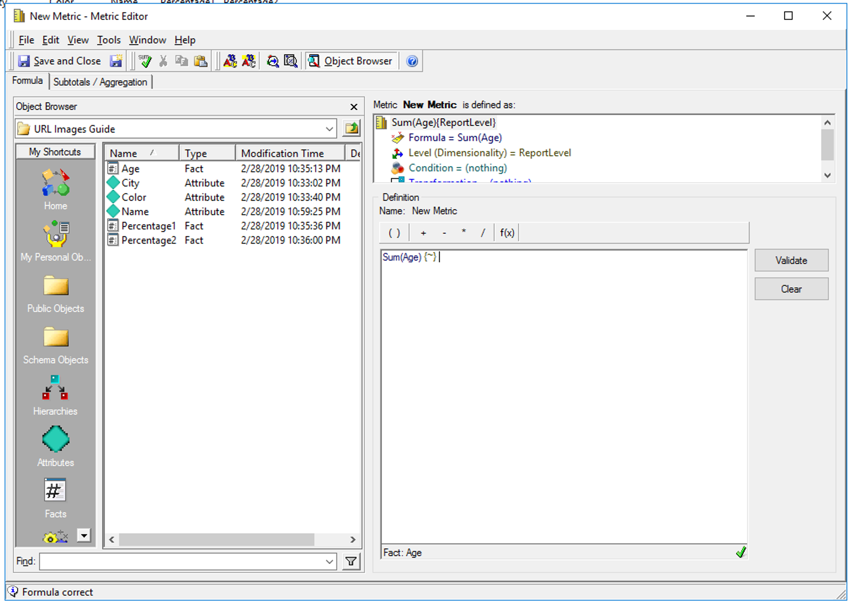
- Click Save and Close. Create as many metrics as needed for your dataset.
Create an OLAP Cube
- Open the folder you'd like to store your cube in.
- Click File > New > Intelligence Cube.
- Select Empty Cube and click OK.
- Open the folder where you’ve saved your attributes and metrics. Double-click the attributes and metrics you want in your cube.
- Click Save and Close.
- Click Update Schema
 .
. - Publish the cube.
Now you can create Profile cards using your OLAP cube to include images. In the Profile card, click the image bubble and select the Image form. The Image form may appear as “Synonym X”.