MicroStrategy ONE
Integrating MicroStrategy With Snowflake for Single Sign-On Using Okta
Starting in MicroStrategy 2020 Update 2, MicroStrategy supports connection to Snowflake through OAuth authentication.
OAuth authentication is supported only in MicroStrategy Web, Library, and Mobile with HTTPS enabled. OAuth authentication is not supported in MicroStrategy Workstation or Developer.
MicroStrategy and Snowflake also support single sign-on (SSO) using SAML protocol, and Okta as an Identiy Provider (IdP).
If any of the following steps have already been configured in your environment, you can skip them.
- Configure MicroStrategy to use single sign-on with Okta
- Configure Snowflake to use single sign-on with Okta
- Configure the database instance to use Okta
- Consume data from dashboards and reports
- Troubleshooting
Configure MicroStrategy to Use Single Sign-On with Okta
Refer to the following documentations to configure MicroStrategy Web and Library to use single sign-on.
MicroStrategy only supports JSP Web. IIS is not supported.
- Enabling SAML Authentication for MicroStrategy Library
- Enabling SAML Authentication for JSP Web and Mobile
- Integrating SAML Support with Okta
- Mapping SAML Users to MicroStrategy
Once you've completed all steps, you can troubleshoot the configuration.
Troubleshoot and Test the Configuration
-
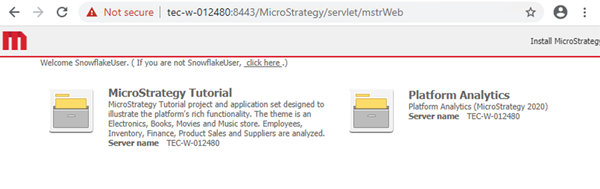
Access your MicroStrategy Web URL. For example,
https://tec-w-012480:8443/MicroStrategy/servlet/mstrWeb.You are redirected to Okta's authentication page.
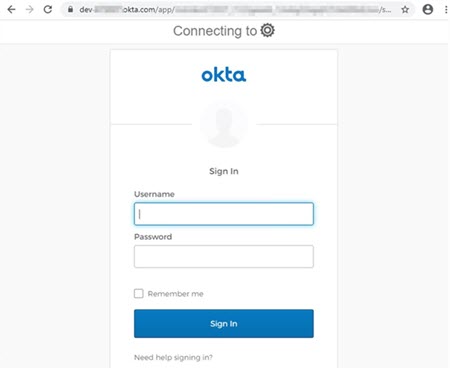
-
Enter your credentials to authenticate to Okta. You are redirected to MicroStrategy Web or Library.
Configure Snowflake to Use Single Sign-On with Okta
Refer to following Snowflake documentations to set up Snowflake single sign-on authentication with Okta.
- Overview of Federated Authentication and SSO
- Configuring an Identity Provider (IdP) for Snowflake: Okta Setup
- Configuring Snowflake to Use Federated Authentication
Troubleshoot and Test the Single Sign-On Configuration
The Okta account used as IdP for Snowflake must be the same account used to authenticate MicroStrategy.
-
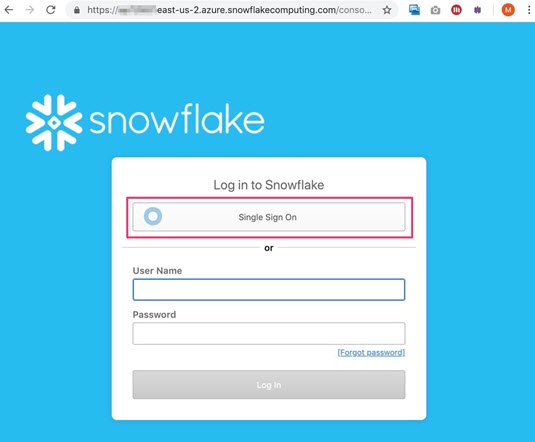
Access Snowflake via the web interface. For example, https://XXXXX.snowflakecomputing.com/.
-
Click Single Sign On. You are redirected to Okta's authentication page.
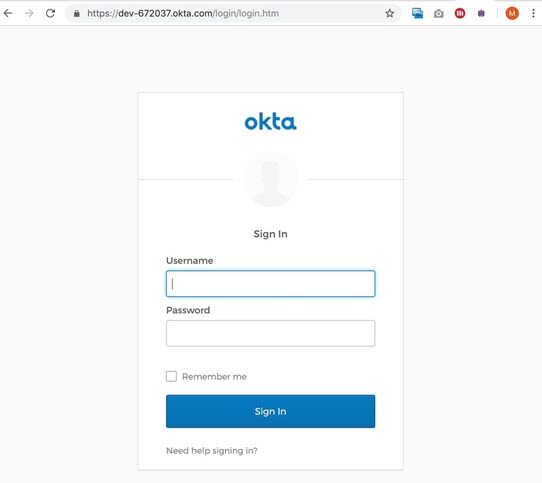
-
Enter your credentials to authenticate to Okta. You are redirected to the Snowflake web interface and a console appears.
Set Up Okta's External OAuth Security Integration
MicroStrategy automatically authenticates users in Snowflake using OAuth authentication. To allow OAuth authentication in Snowflake using Okta as the IdP, refer to the following Snowflake documentations.
When creating the Authorization server in Okta (described in Step 2: Create an OAuth Authorization Server), the following scopes must be specified:
- session:role-any
- openid
- profile
- offline_access

Test External OAuth Configuration
Refer the following Snowflake documentations.
Configure the Database Instance to Use Okta
Create a Basic Authentication Database Connection
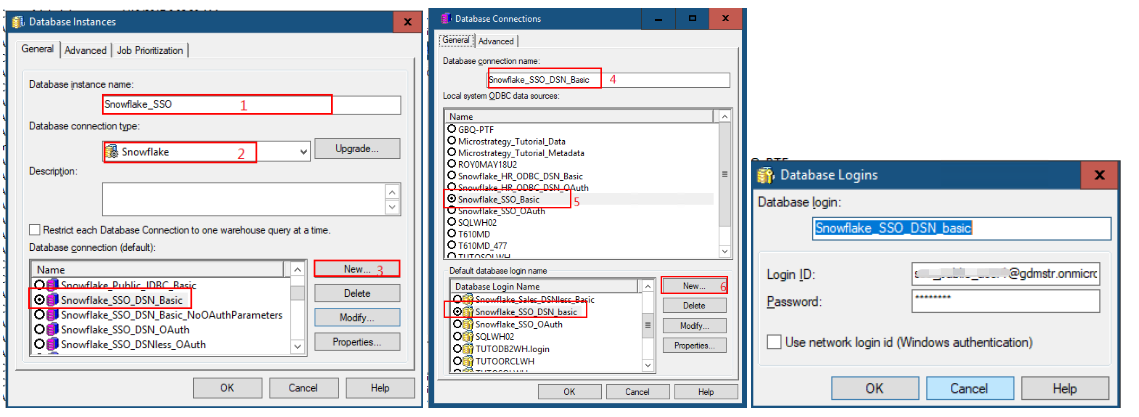
In MicroStrategy Developer, create a new database instance with a basic authentication connection.
- In the Database instance name field, type in a name.
- From the Database connection type drop-down, select Snowflake.
- Click New to create a new database connection.
- In the Database connection name field, type in a name.
- Select the DSN.
-
Create a database login and save your settings.
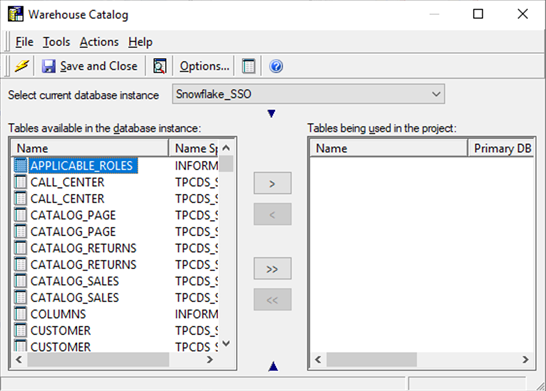
Add Warehouse Tables to the Warehouse
Once the database instance is created, it can be used to add tables to the project schema via MicroStrategy Developer.
Create an OAuth Authentication Database Connection
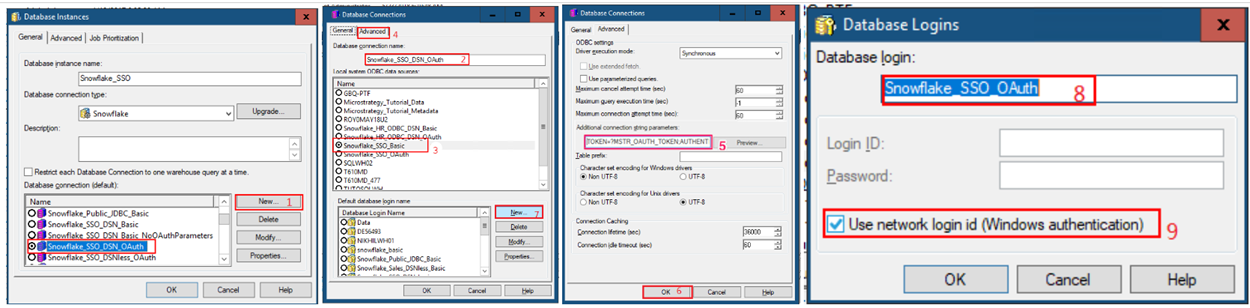
After adding tables to the project schema, another database connection can be created for OAuth authentication.
- Create an OAuth database connection via MicroStrategy Developer:
- Select the Snowflake_SSO_DSN_OAuth default connection and click New.
- In the Database connection name field, type in a name.
- Select the DSN.
- Go to the Advanced tab.
In the Additional connection string parameters field, enter TOKEN=?MSTR_OAUTH_TOKEN;AUTHENTICATOR=oauth;.
This will act as a placeholder that will be replaced by a real token when the user uses the Snowflake database instance.
- Click OK.
- Click New.
In the Database login, enter a name.
Select the Use network login id (Windows authentication) checkbox.
- Set the OAuth parameters in MicroStrategy Web:
- Log in to MicroStrategy Web as the administrator user.
- In the Database Instance menu, select OAuth Parameters.
- Fill out the required fields:
- When setting OAuth parameters, select OKTA.
- For Client ID, recover the Client ID saved in Step 1: Configure Okta for External OAuth.
- For Client Secret, recover the Client Secret saved in Step 1: Configure Okta for External OAuth.
- For OAuth URL and Token URL, edit the Snowflake's Authorization Server created in Okta (as described in Step 2: Create an OAuth Authorization Server).
- Navigate to the Okta Admin Console.
In the Security menu, go to API > Authorization Servers.
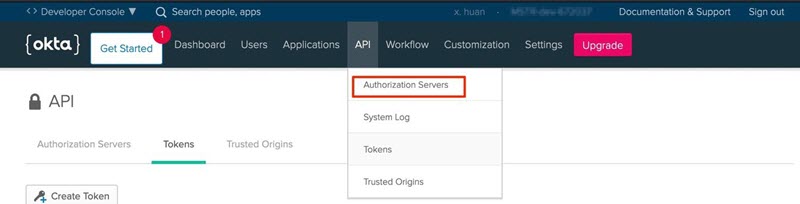
Edit Snowflake's related authorization server.
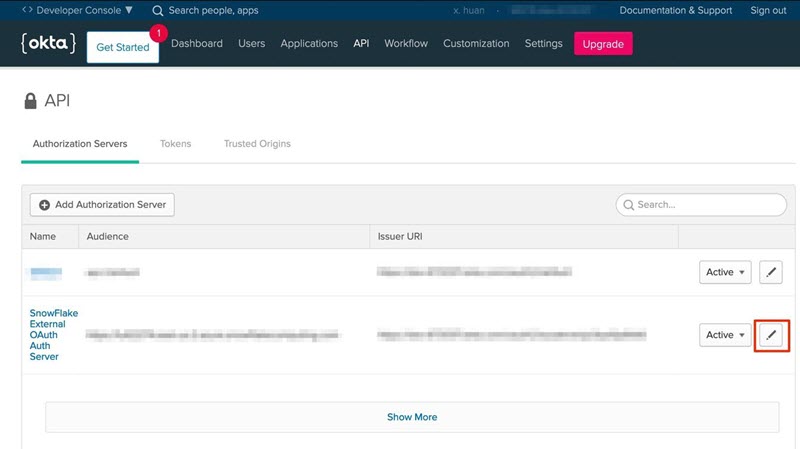
Copy the value for Issuer. The value should be similar to https://dev-XXXXX.oktapreview.com/oauth2/YYYYY.

To obtain the Init OAuth URL and Refresh Token URL, add the following values to the Issuer value:
Init OAuth URL:
https://dev-XXXX.oktapreview.com/oauth2/YYYYY/v1/authorizeRefresh token URL:
https://dev-XXXXX.oktapreview.com/oauth2/YYYY/v1/token- Copy the Callback URL. This will be whitelisted.
- Whitelist the callback URL:
- In the Okta Admin Console, go to the application created in Step 1: Create an OAuth Compatible Client to Use with Snowflake.
- Go to the General tab.
- Click Edit.
- Locate the Login redirect URIs section and click Add URI.
- Add the copied Callback URL to the list.
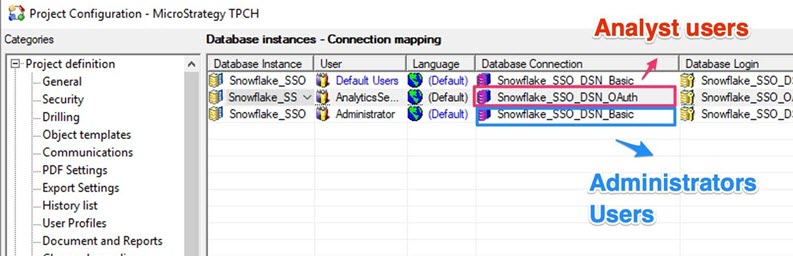
Create Connection Mapping for Non-Admin Users
In this example workflow, an administrator wants to use basic authentication in MicroStrategy Developer. Then, the analyst uses OAuth authentication in MicroStrategy Web and Library.
A connection mapping can be created for the analyst to use the Snowflake_SSO_DSN_OAuth connection, and for the administrator to use the Snowflake_SSO_DSN_Basic connection. For more information on connection mapping, see Controlling Access to the Database: Connection Mappings.
- In MicroStrategy Developer, right-click on Project > Project Configuration.
- Go to Database Instances > Connection Mapping.
- Right-click on the grid > New.
-
Modify the connection mapping to have the appropriate fields.
In this example, the OAuth database connection name is Snowflake_SSO_DSN_OAuth and the basic database connection name is Snowflake_SSO_DSN_Basic.
- Click OK.
- Go to Administration > Database Instances.
- Edit the database instance. In this example, the database instance is Snowflake_SSO.
- Select Snowflake_SSO_DSN_Basic as the default database connection.
- Click OK.
Consume Data from Dashboards and Reports
Authenticate to Snowflake from MicroStrategy Web
Using an analyst user mapped to the Okta user (as explained in Mapping SAML Users to MicroStrategy), log in to MicroStrategy Web.
-
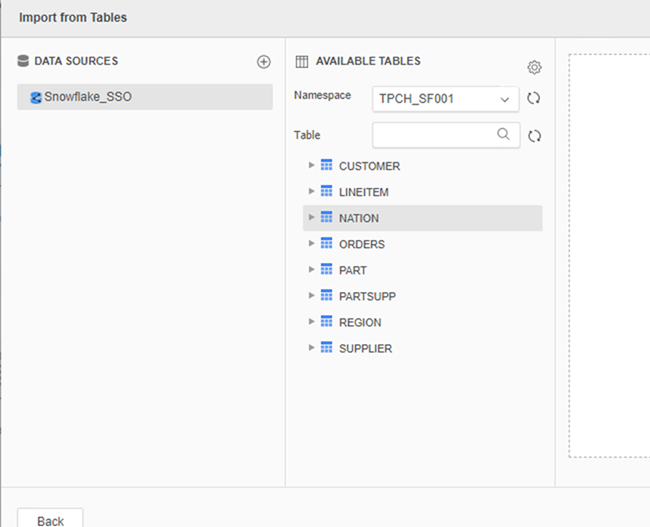
In the Data Import dialog, select the primary database instance for the project. For example, Snowflake_SSO.
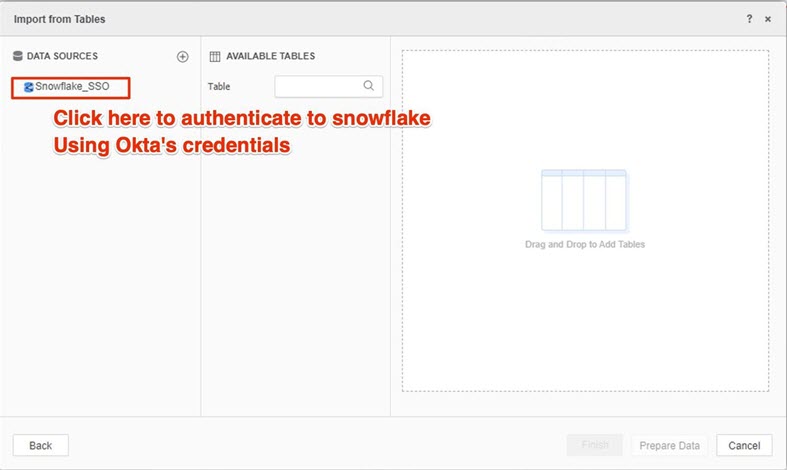
The Okta authentication page momentarily appears and then disappears. If you encounter a 404 error, then the Callback URL is not correctly whitelisted.
-
Select the database instance. The dialog displays.
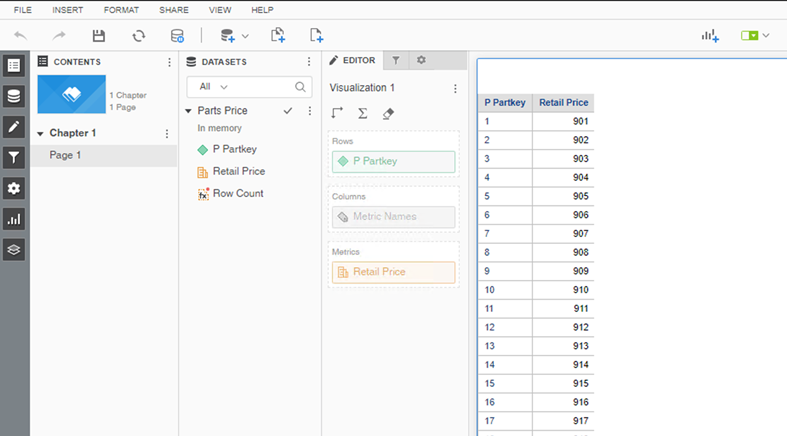
At this point, you are authenticated to Snowflake and can access data and dashboards with their credentials.
Execute Dashboards
Execute a project schema based dashboard.
Troubleshooting
When authenticating to Snowflake from the Data Import dialog, a screen appears with a 404 error
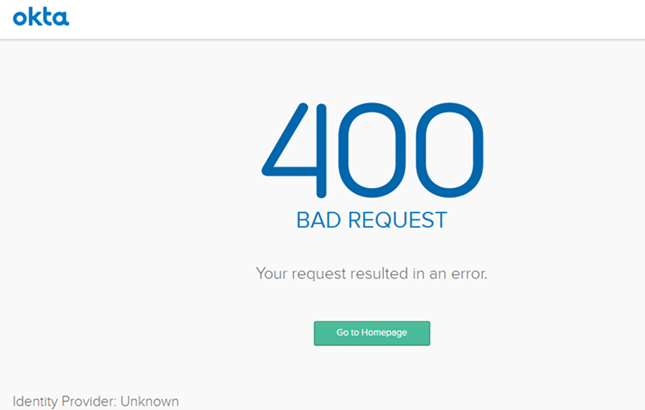
Cause: The callback URL was not added to the whitelist of valid redirect URLs.
Solution: Add the appropriate callback URL to the whitelist of valid URLs as described in Whitelist the Callback URL.
Failed to retrieve refresh token for autehenticationError in Process method of Component: Query EngineServer, Project MicroStrategy TPCH, Job 42, Error Code = -2147212544

Cause: Authentication to Snowflake has not been established yet.
Solution: You need to authenticate to Snowflake via the Data Import dialog.
Client ID or Clietn Secret not found in metadata. Error in Process method of Component: QueryEngineServer, Project MicroStrategy TPCH, Job 69, Error Code = -2147212544

Cause: Connection mapping resolves to the basic authentication database connection.
Solution: Confirm the connection mapping is mapped correctly for the user. Change the default database connection for the database instance.
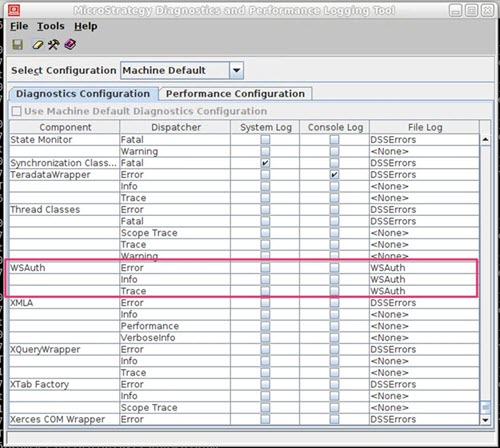
Intelligence Server Logs
In case of errors, please enable WSAuth.log, as well as DSSErrors.log. It is also recommended that you place the file log for the WSAuth components directly in the DSSErrors.log.
Snowflake Driver Log
To enable the Snowflake driver, see KB48422: How to enable debug log for newly bundled Snowflake driver.
Related Content
KB484275: Best practices for using the Snowflake Single Sign-on (SSO) feature
Integrating MicroStrategy with Snowflake for Single Sign-On using Azure AD