MicroStrategy ONE
Starting in MicroStrategy 2021 Update 7 (October 2022), embedded surveys are no longer supported.
Introduction to Embedding Surveys
Embedded surveys allow you to collect information and feedback from users viewing a dashboard. There are two types of surveys that can be embedded: SurveyMonkey and Alchemer.
SurveyMonkey and Alchemer are two types of Community Connectors. To use Community Connectors, you must configure and deploy the connectors in MicroStrategy Web. For more information, see MicroStrategy Community Data Connectors.
How to Add an Embedded Survey
- Open a new or existing dashboard.
- From the dashboard's toolbar, click Survey
 .
. - Click SurveyMonkey or Alchemer.
After adding a survey to your dashboard, you can either log in to your account or use a URL to embed a survey.
- SurveyMonkey
- Alchemer
How to Add a Survey from Your SurveyMonkey Account
You must have a Team Premier or Enterprise account to import your data and survey. For more information, see SurveyMonkey Plans.
There is a 500 API calI limit per day. For more information, see the SurveyMonkey Help.
- On the Survey Editor, click From SurveyMonkey Account.
- Enter your SurveyMonkey log in credentials.
- Click Log In.
- Use the drop-down to choose your survey.
-
Use the drop-down to choose your web link collector.
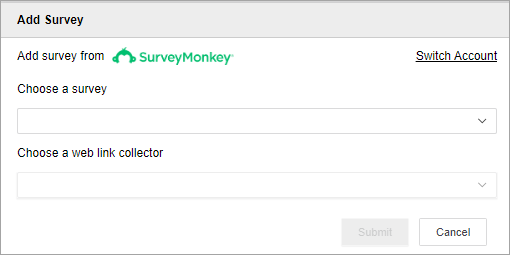
- Click Submit.
You may notice that the Custom Variables section of the Survey Editor is pre-populated with existing variables. Custom Variables allow you to tailor the fields in your survey to specific objects.
How to Customize Variables on Your Dashboard
Adding and personalizing Custom Variables on the Survey Editor automatically changes the survey.
To add Custom Variables to your dashboard, your survey must already have them. For more information on adding Custom Variables to your survey, see the SurveyMonkey Help.
- Under each variable, use the drop-down to select the type of variable value. The three options are:
- Attribute/Metric: Drag and drop an object from your dataset panel to the empty field.
The first element of the attribute by default sort will appear on your survey.
To allow end users to choose which object element is used on the survey, add a filter to your dashboard that targets the survey. To ensure a predictable behavior for end users when selecting an attribute element to use on the survey, disable the Allow multiple selections option, or choose a single-selection filter, such as Radio Buttons.
- System Property: Use the drop-down to select Full Name, Dashboard Name, or Project Name as your variable value.
Custom: Enter a variable value in the textbox and press Enter.
- Attribute/Metric: Drag and drop an object from your dataset panel to the empty field.
How to Add a Survey from a SurveyMonkey URL
- On the Survey Editor, click By URL.
- In the Insert URL textbox, enter a survey link.
The survey URL must have a Custom URL Ending to add Custom Variables. For more information, see Customizing Survey Links.
- Click Validate.
You may notice that the Custom Variables section of the Survey Editor is pre-populated with existing variables. Custom Variables allow you to tailor the fields in your survey to specific objects.
How to Customize Variables on Your Dashboard
Adding and personalizing Custom Variables on the Survey Editor will automatically change the survey and SurveyMonkey URL
To add Custom Variables to your dashboard, your survey must already have them.
-
Under each variable, use the drop-down to select the type of variable value. The three options are:
- Attribute/Metric: Drag and drop an object from your dataset panel to the empty field.
The first element of the attribute by default sort will appear on your survey.
To allow end users to choose which object element is used on the survey, add a filter to your dashboard that targets the survey. To ensure a predictable behavior for end users when selecting an attribute element to use on the survey, disable the "Allow multiple selections" option, or choose a single-selection filter, such as Radio Buttons.
- System Property: Use the drop-down to select Full Name, Dashboard Name, or Project Name as your variable value.
-
Custom: Enter a variable value in the textbox and press Enter.
- Attribute/Metric: Drag and drop an object from your dataset panel to the empty field.
How to Add a Survey from Your Alchemer Account
SurveyGizmo has been renamed to Alchemer.
You must have a Professional Plan to import your data and survey. For more information, please see Alchemer Plans.
- On the Survey Editor, click From Alchemer Account.
- Enter your Alchemer login credentials.
- Click Authenticate.
- Click Approve.
- Use the drop-down to choose your survey.
-
Use the drop-down to choose your web link campaign.
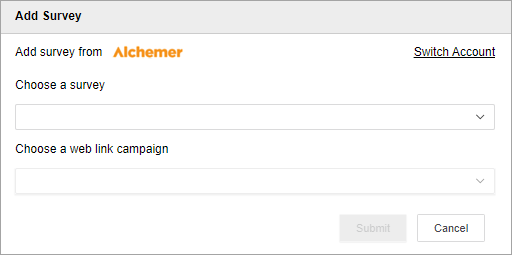
- Click Submit.
If you have URL Variables in your survey, you need to add them in your dashboard using the URL Variables section of the Survey Editor.
How to Customize URL Variables on Your Dashboard
Adding and customizing URL Variables on the Survey Editor will automatically change the survey.
To add URL Variables to your dashboard, your survey must already use them. For more information on adding URL Variables to your survey, see the Alchemer help.
- On the Survey Editor, click Add URL Variables.
- Double click on the default variable name to rename it. Your variable name in the dashboard must match the variable name in your survey.
-
Under each variable, use the drop-down to select the type of variable value. The three options are:
- Attribute/Metric: Drag and drop an object from your dataset panel to the empty field.
The first element of the attribute by default sort will appear on your survey.
To allow end users to choose which object element is used on the survey, add a filter to your dashboard that targets the survey. To ensure a predictable behavior for end users when selecting an attribute element to use on the survey, disable the Allow multiple selections option, or choose a single-selection filter, such as Radio Buttons.
- System Property: Use the drop-down to select Full Name, Dashboard Name, or Project Name as your variable value.
-
Custom: Enter a variable value in the textbox and press Enter.
- Attribute/Metric: Drag and drop an object from your dataset panel to the empty field.
How to Add a Survey from an Alchemer URL
- On the Survey Editor, click By URL.
- In the Insert URL textbox, enter a survey link.
- Click Validate.
Your URL Variables appear in your survey. If you have URL Variables in your survey, you need to add them in your dashboard using the URL Variables section of the Survey Editor.
How to Customize URL Variables on Your Dashboard
Adding and customizing URL Variables on the Survey Editor automatically changes the survey and Alchemer URL.
To add URL Variables to your dashboard, your survey must use them. For more information on adding URL Variables to your survey, see the Alchemer help.
- On the Survey Editor, click Add URL Variables.
- Double-click on the default variable name to rename it. Your variable name in the dashboard must match the variable name in your survey.
-
Under each variable, use the drop-down to select the type of variable value. The three options are:
- Attribute/Metric: Drag and drop an object from your dataset panel to the empty field.
The first element of the attribute by default sort will appear on your survey.
To allow end users to choose which object element is used on the survey, add a filter to your dashboard that targets the survey. To ensure a predictable behavior for end users when selecting an attribute element to use on the survey, disable the Allow multiple selections option, or choose a single-selection filter, such as Radio Buttons.
- System Property: Use the drop-down to select Full Name, Dashboard Name, or Project Name as your variable value.
-
Custom: Enter a variable value in the textbox and press Enter.
- Attribute/Metric: Drag and drop an object from your dataset panel to the empty field.